Host your Website on AWS

This guide walks through setting up a website on AWS including creating the necessary resources, configuring the domain, and uploading the website files. This is generally one of the most cost-effective and reliable ways to host a website so pricing is also covered. This manual process is a great way to learn the fundamentals of hosting websites on AWS, but once you're comfortable with the process you can automate this entire setup using Page Tool.
Here's the overview:
- Create and configure AWS resources (S3 storage, CloudFront CDN, and Certificate through Certificate Manager with DNS validation for auto renewal)
- Upload website files (HTML, CSS, JS) to AWS S3 storage
- Connect custom domain to the website by updating the DNS settings with your domain registrar
Create and Configure the S3 Resource
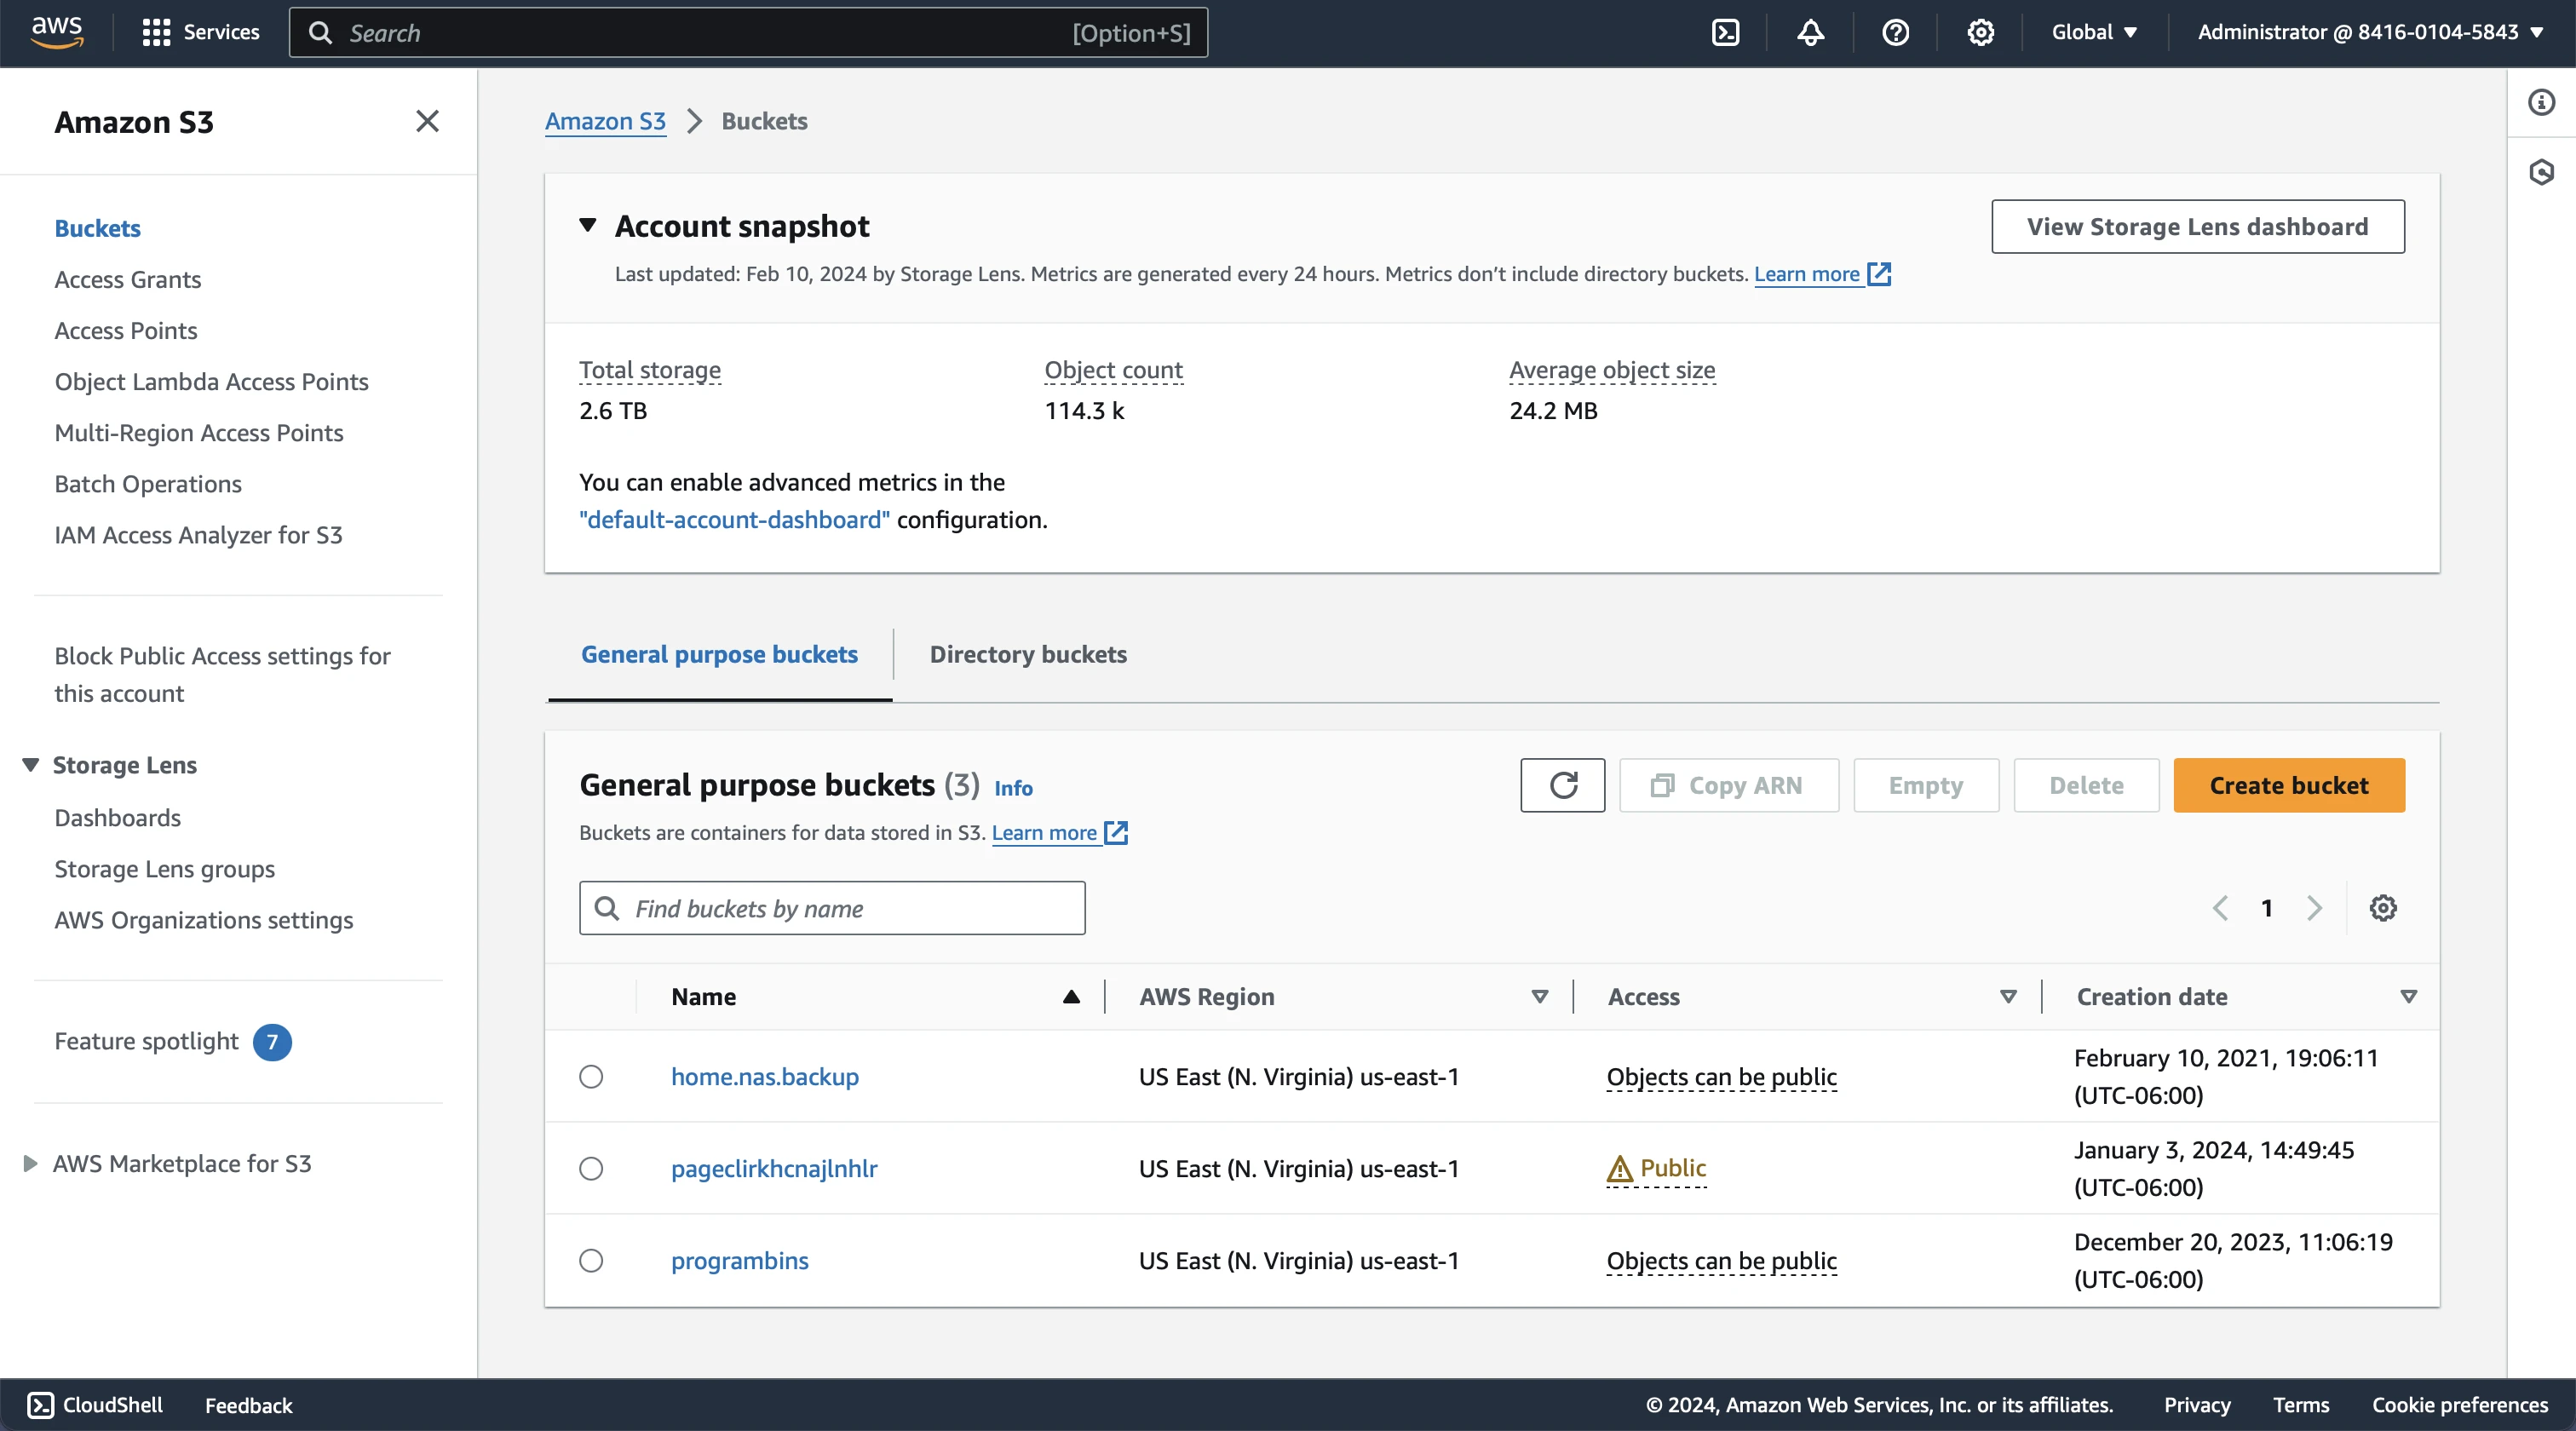
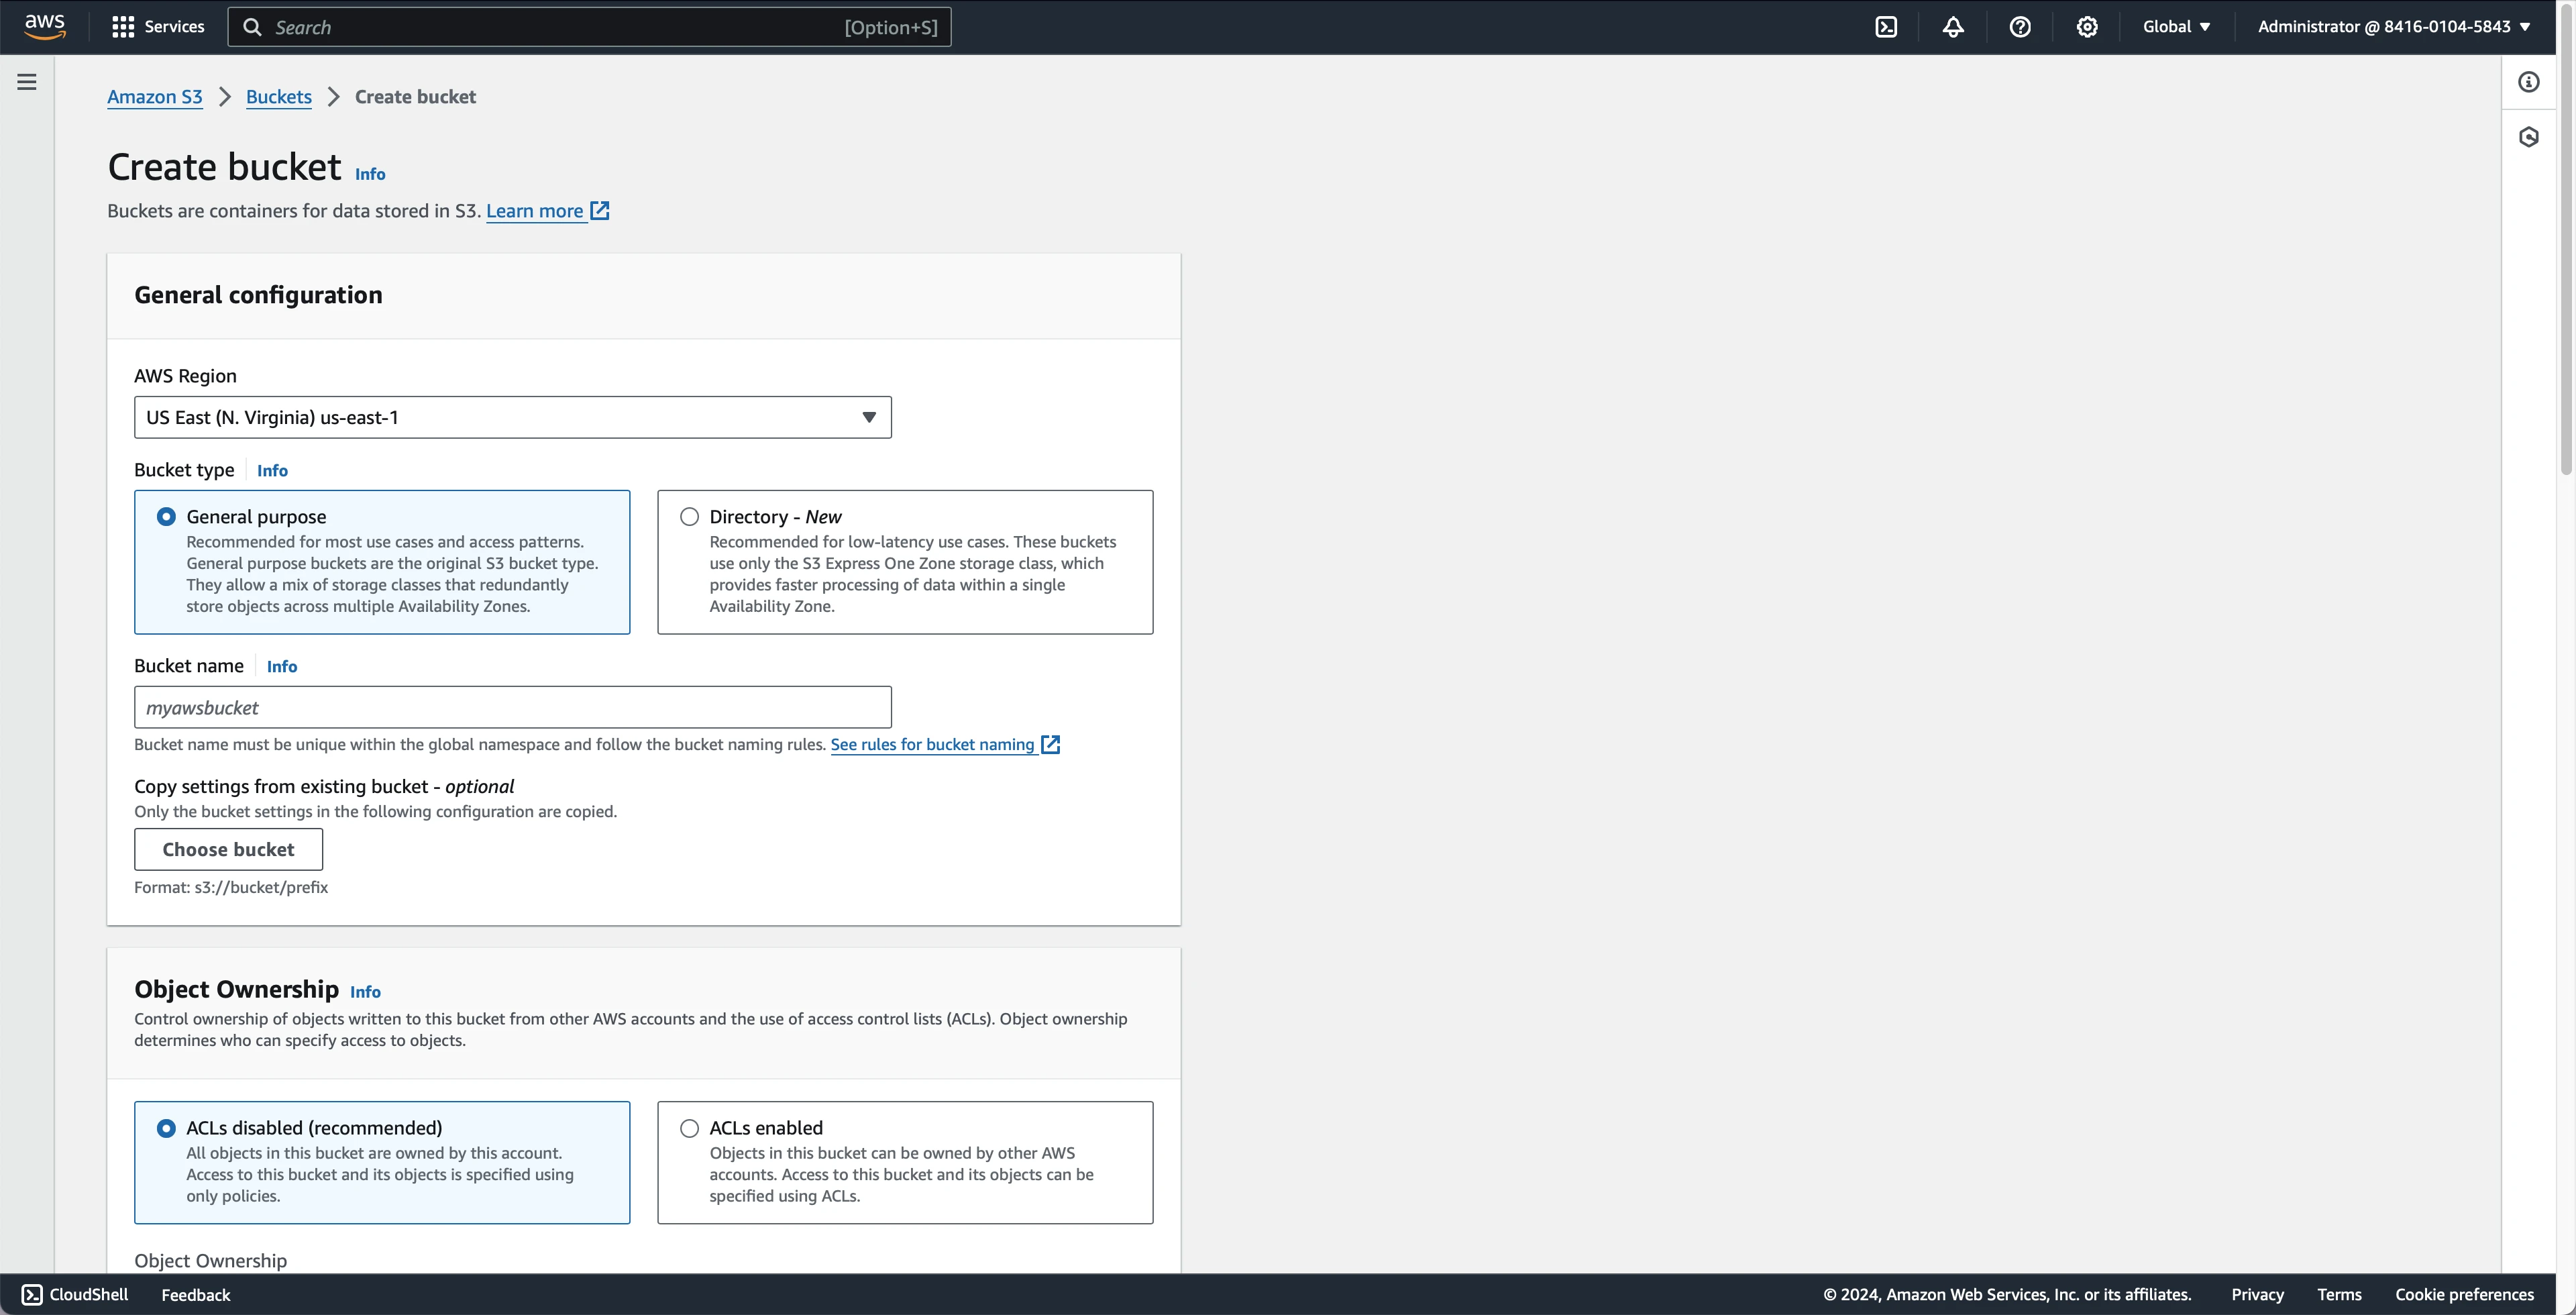
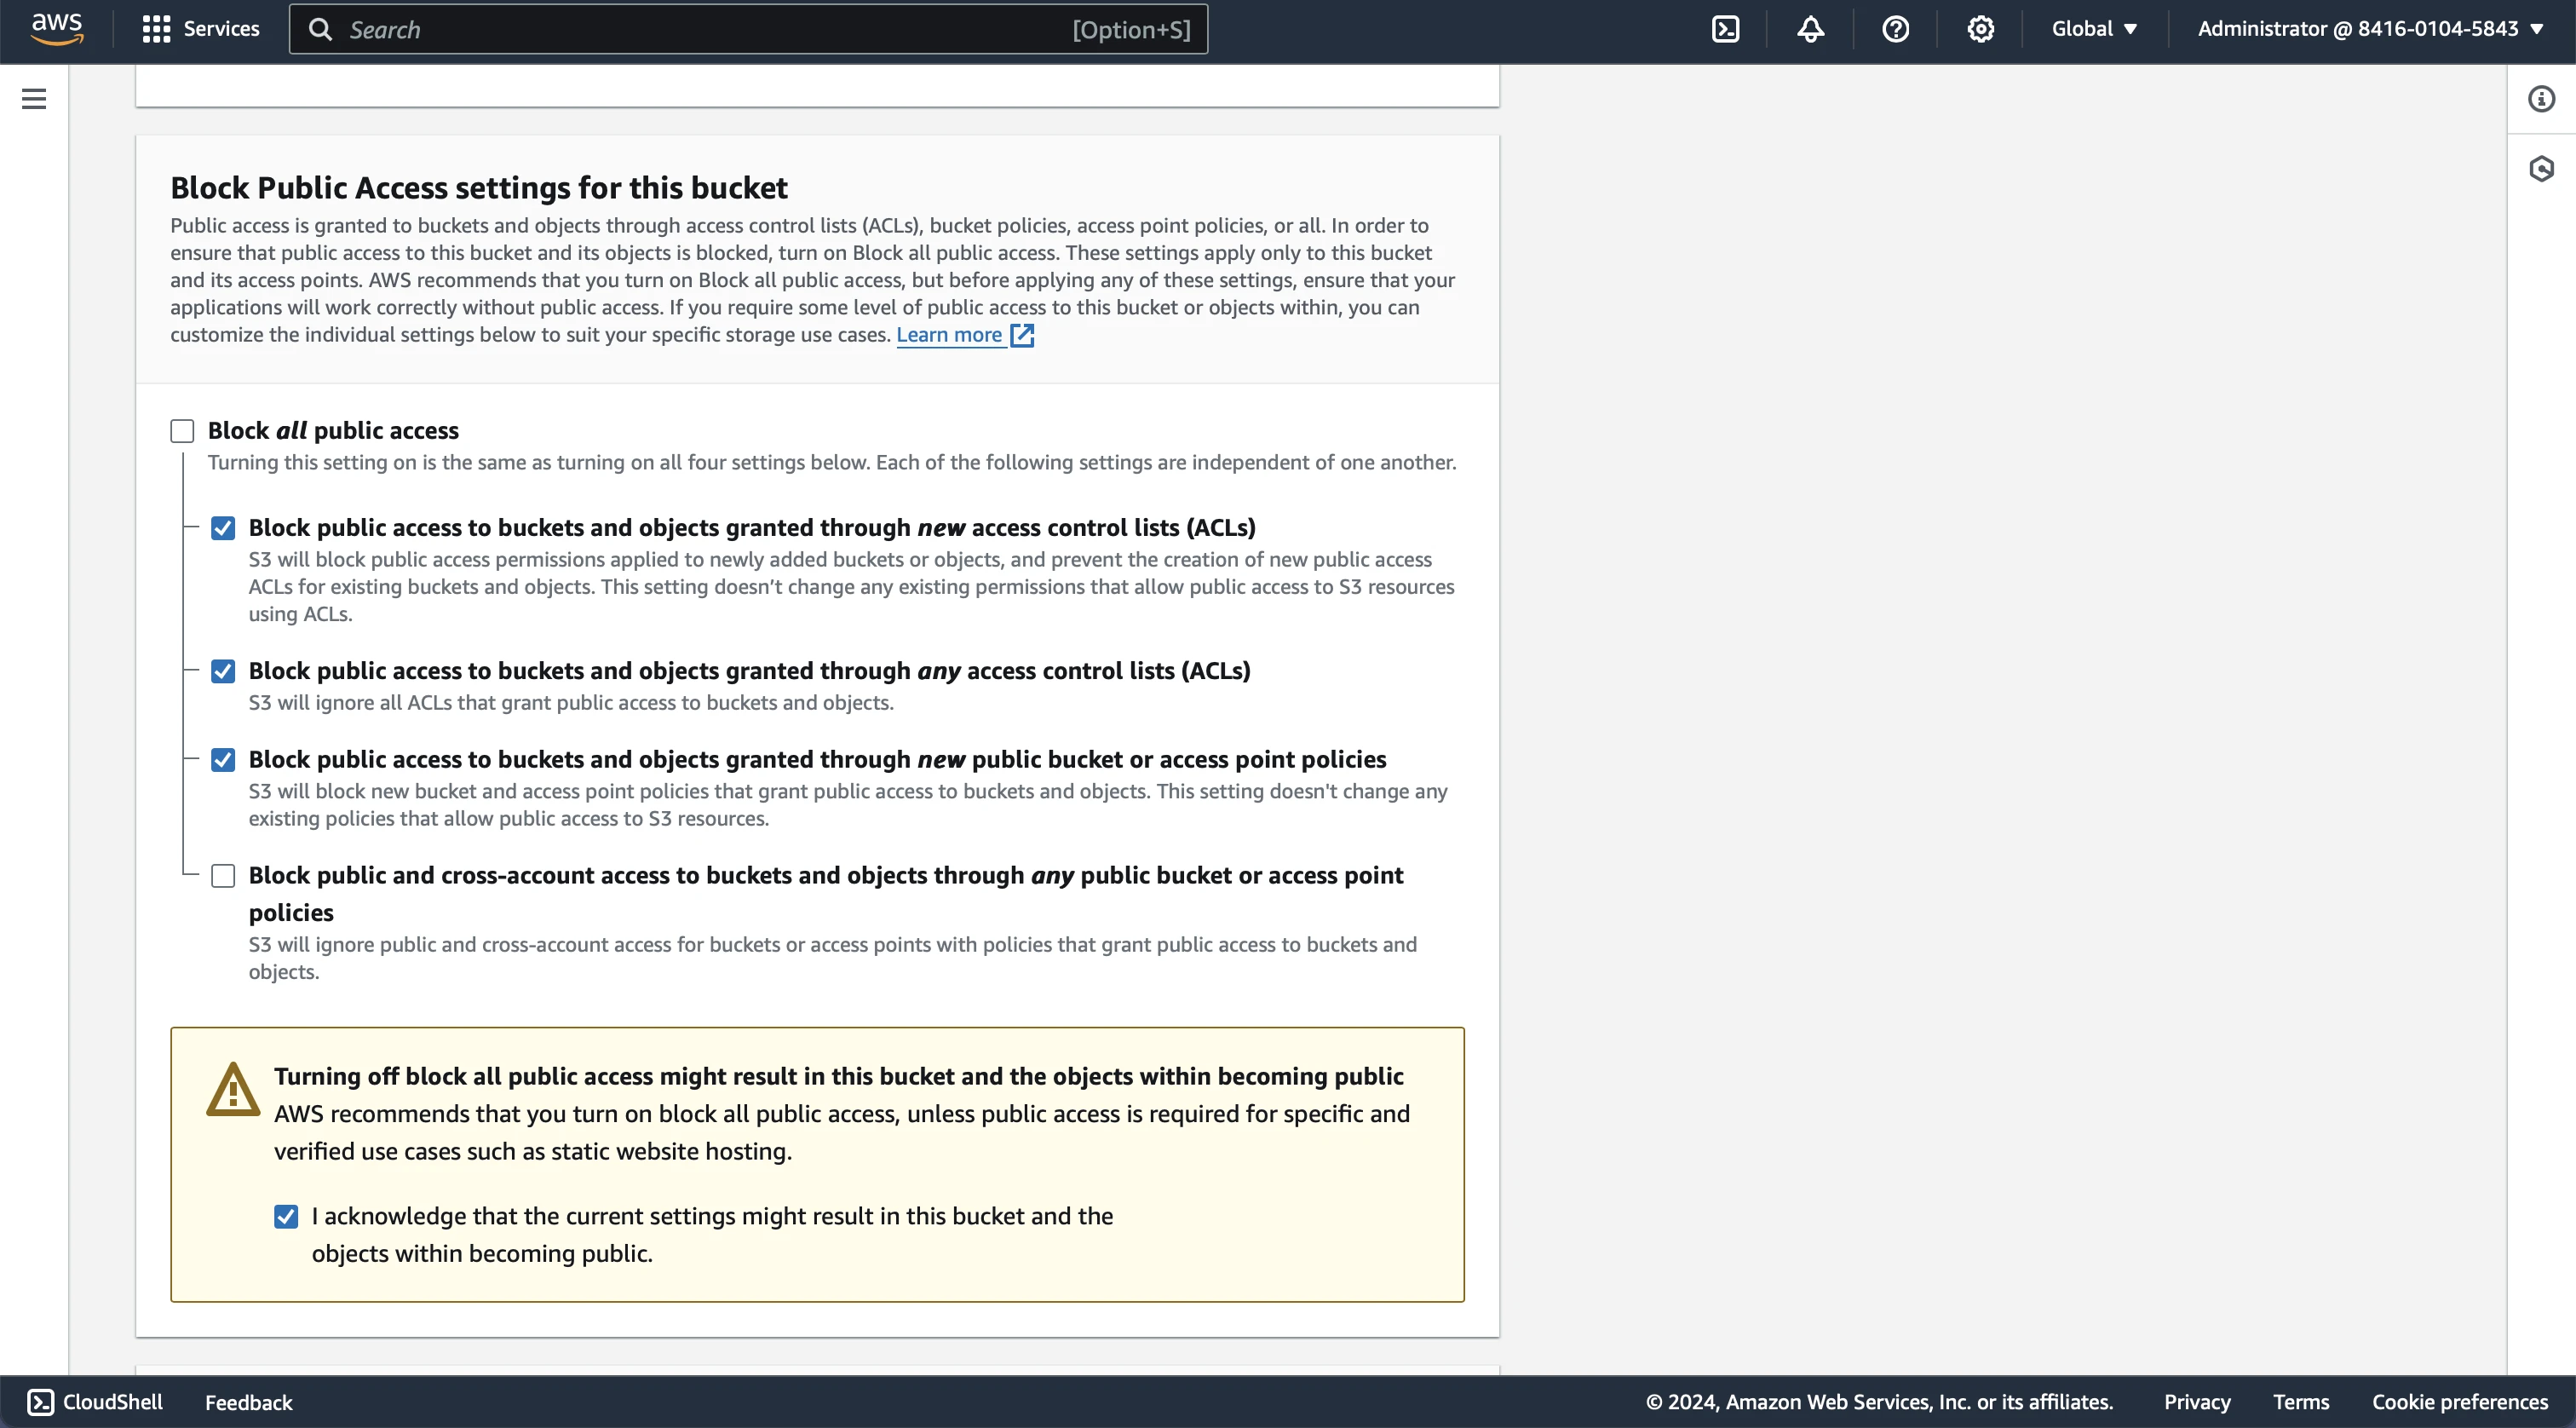
Login to your AWS account and navigate to the S3 console to create a new bucket. Give your bucket a unique name and select the default region. The only other setting to configure on creation is the "Block Public Access settings for this bucket", this grants public access to your website files (see image below).
A note on pricing for this resource:
Amazon S3 operates on pay for what you use model. The cost components that contribute to your overall cost of the resource includes storage pricing, request and data retrieval pricing, data transfer and transfer acceleration pricing, data management and insights feature pricing, replication pricing, and transform and query feature pricing.
For hosting a static website, the essential cost components you need to consider are storage (the amount of storage used by for your website files), request and data retrieval (when website visitors come to your website you incur a cost to deliver your website files), and data transfer (the cost to transfer your website files out of S3 to your users).
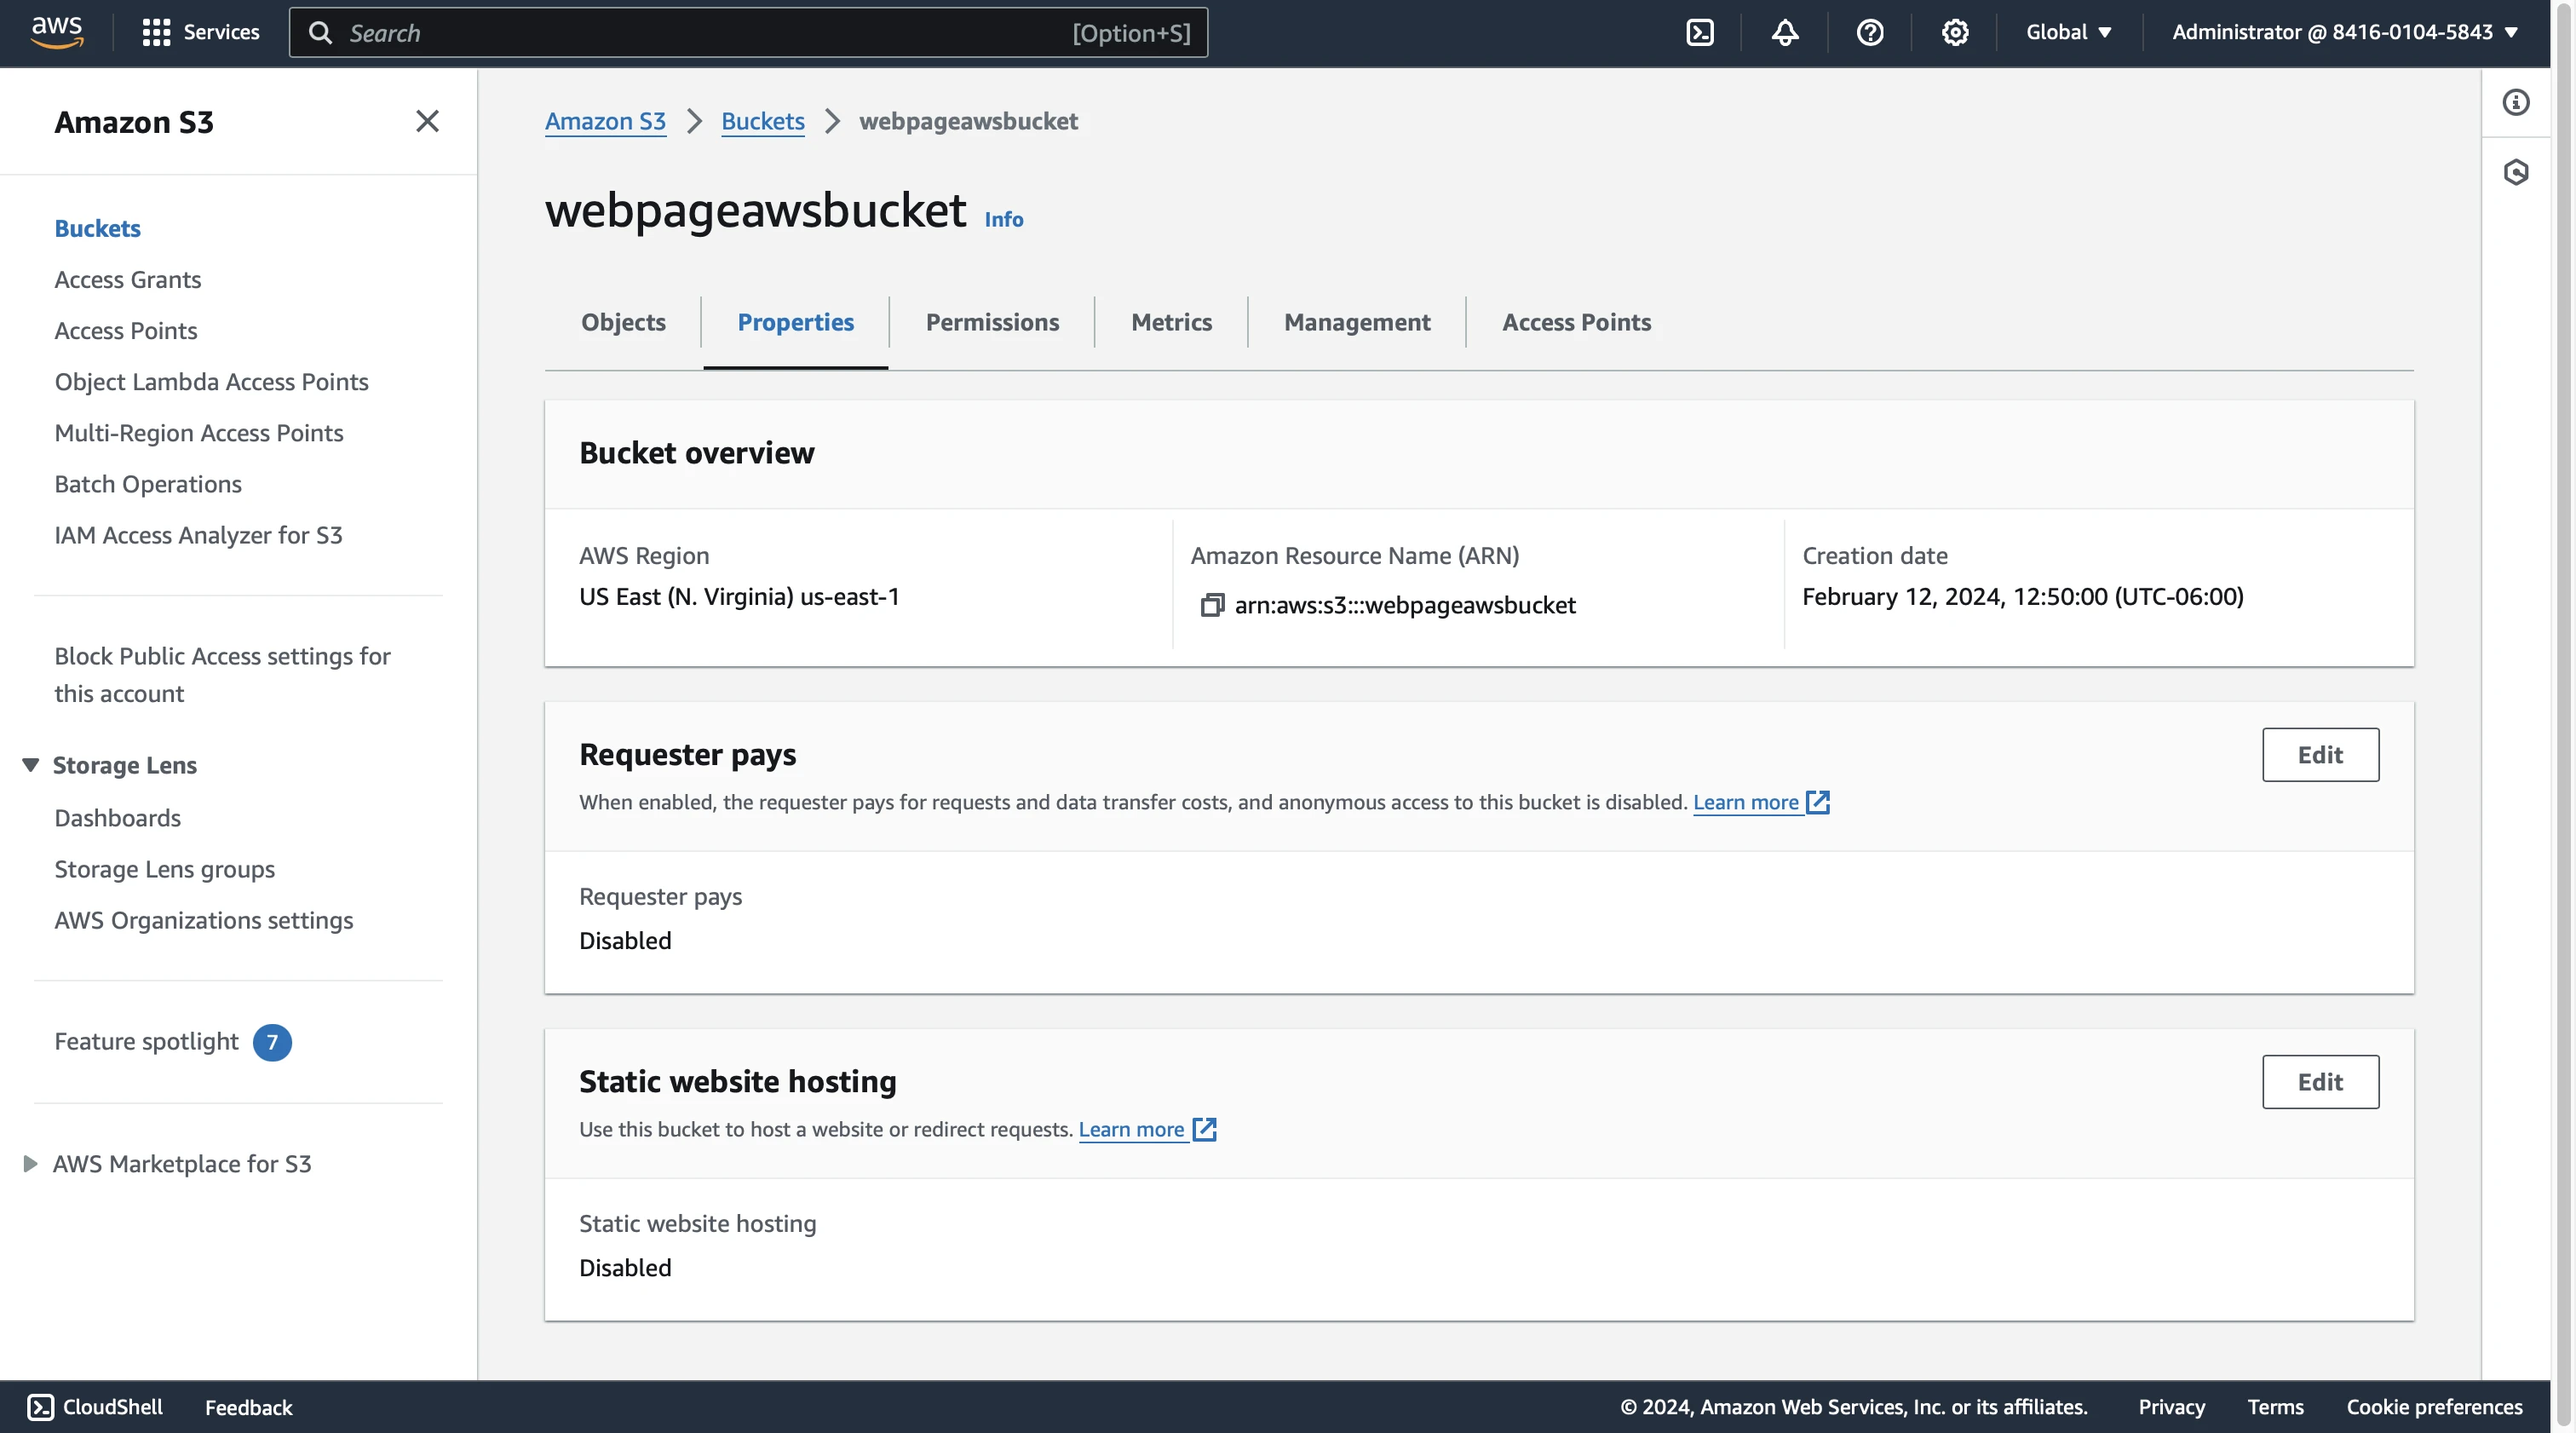
Now let's perform some final configurations on the S3 bucket. Head back to the S3 console and select your S3 bucket.
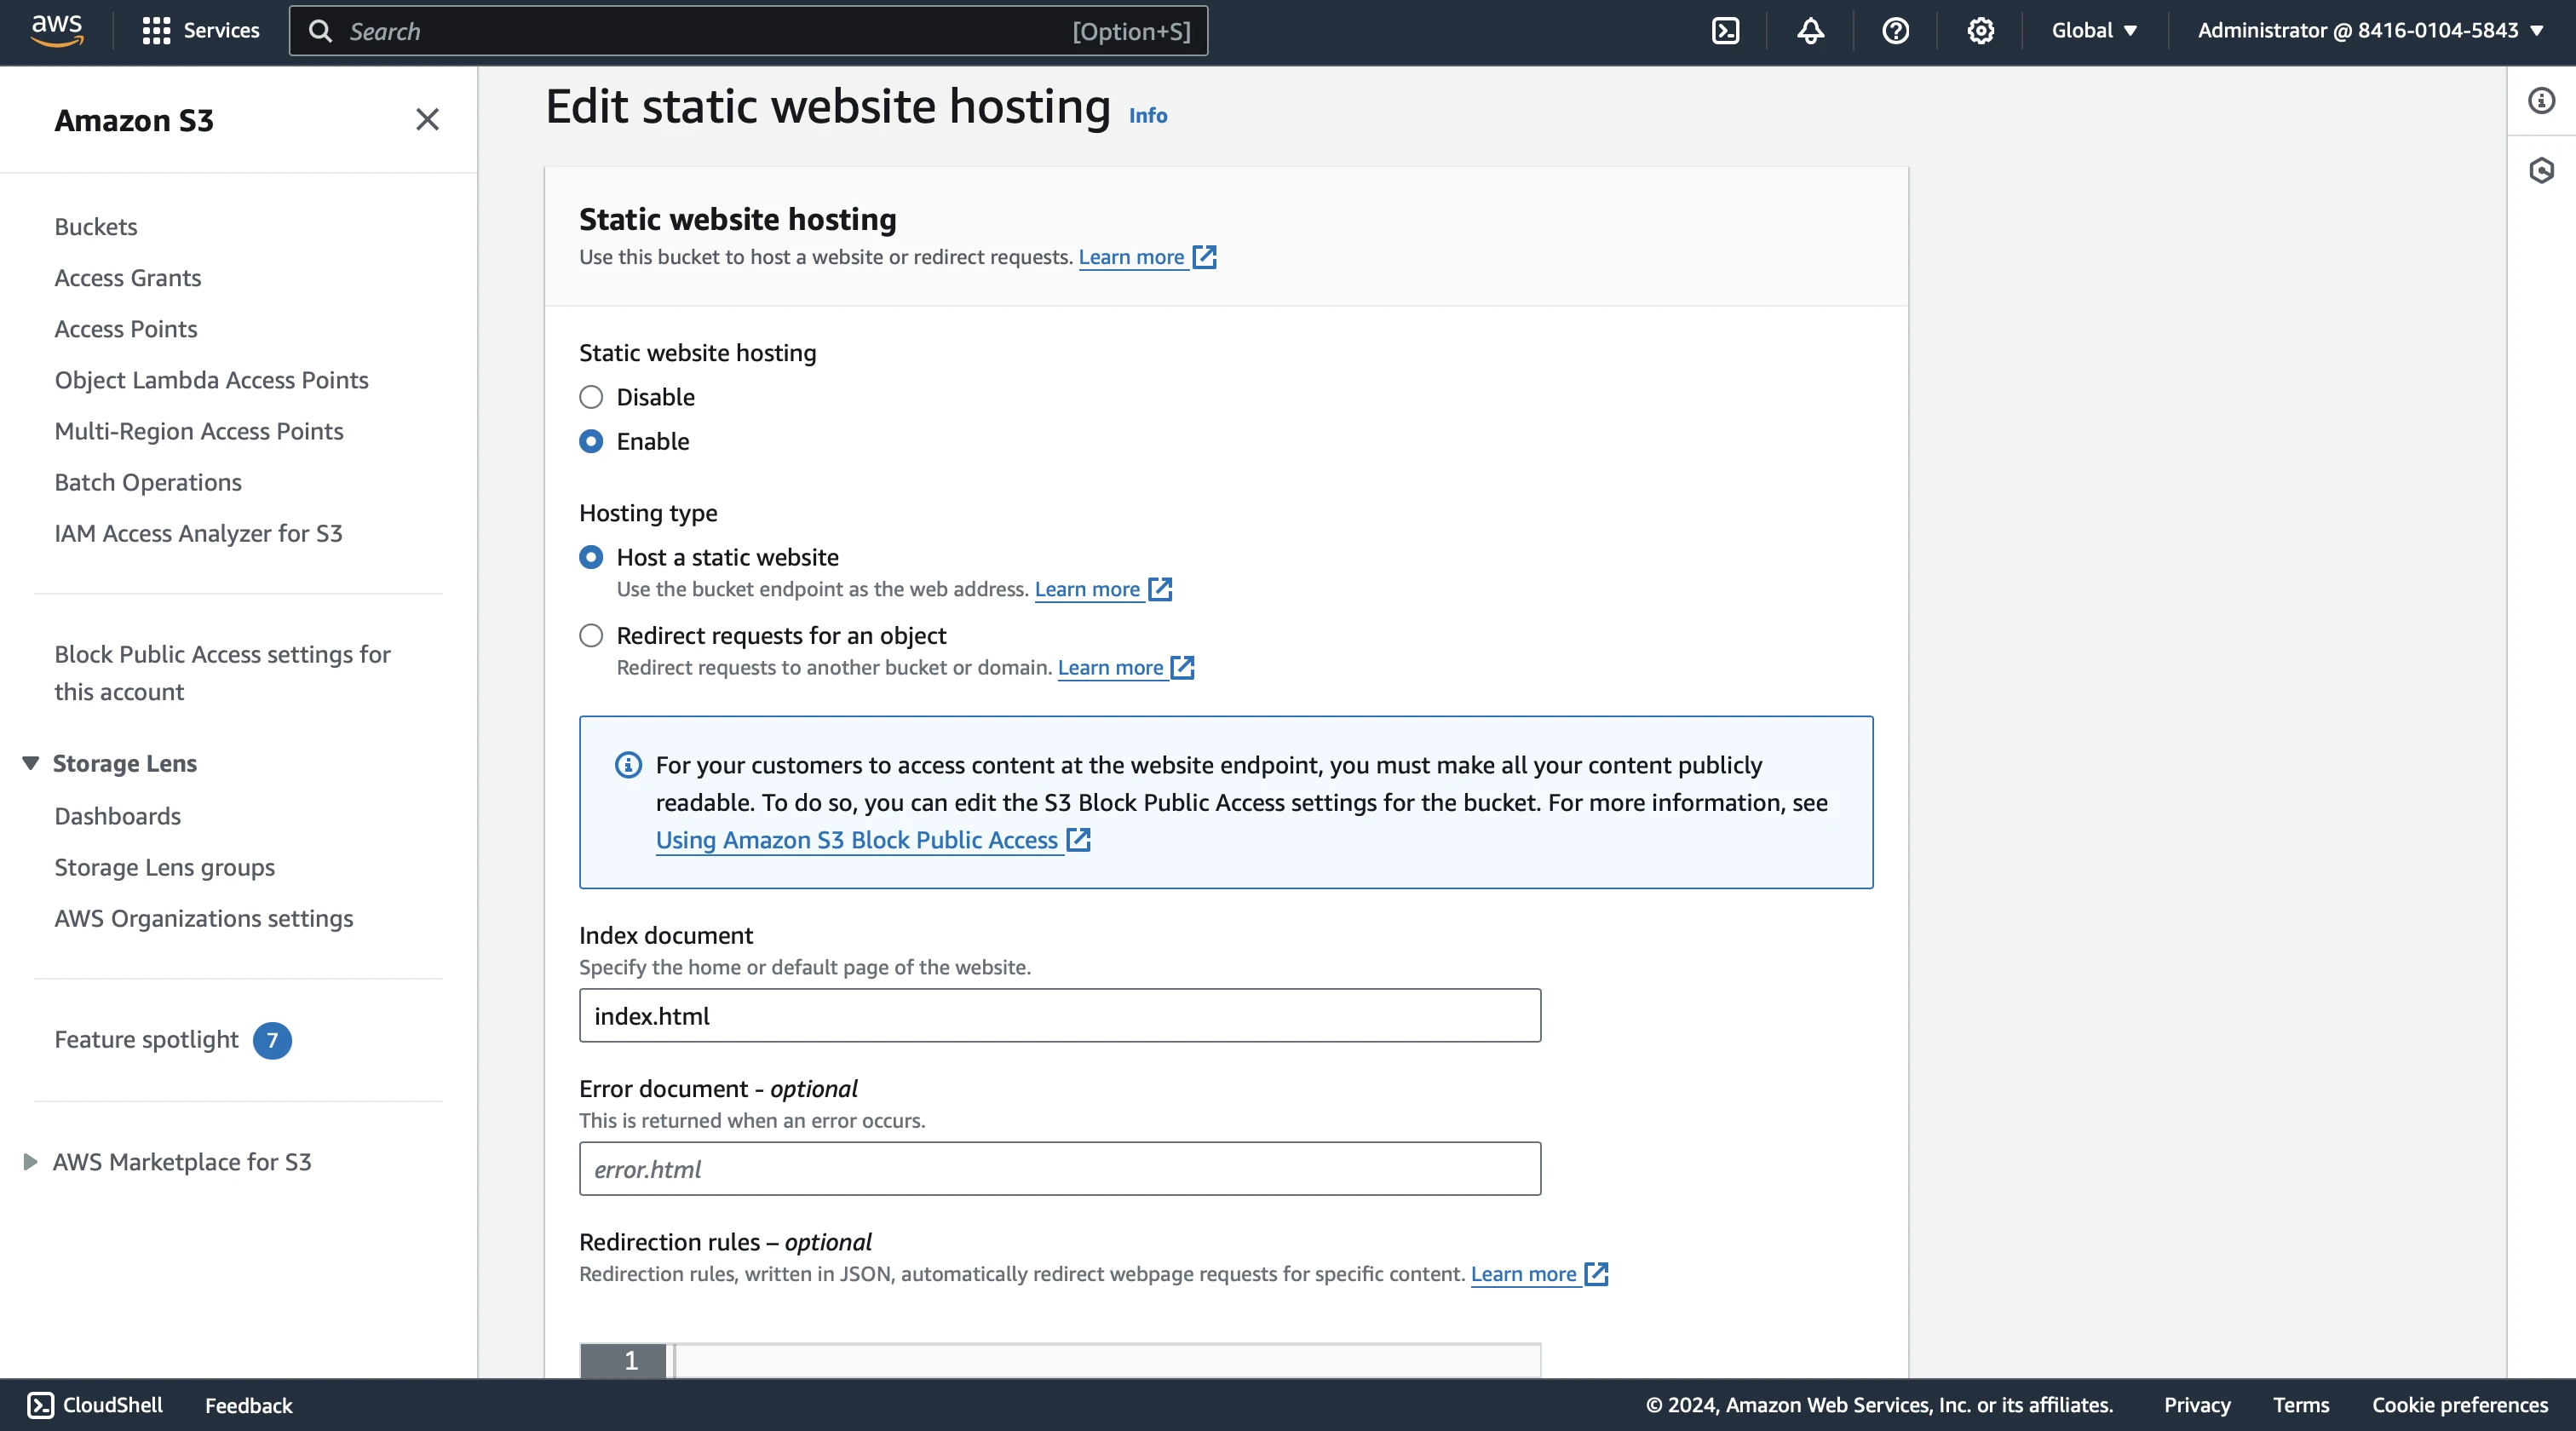
Under the Properties tab you'll find the setting Static website hosting. Select Edit to enable this. Specify the entry point file for your website under Index document, typically index.html. Now save the changes.
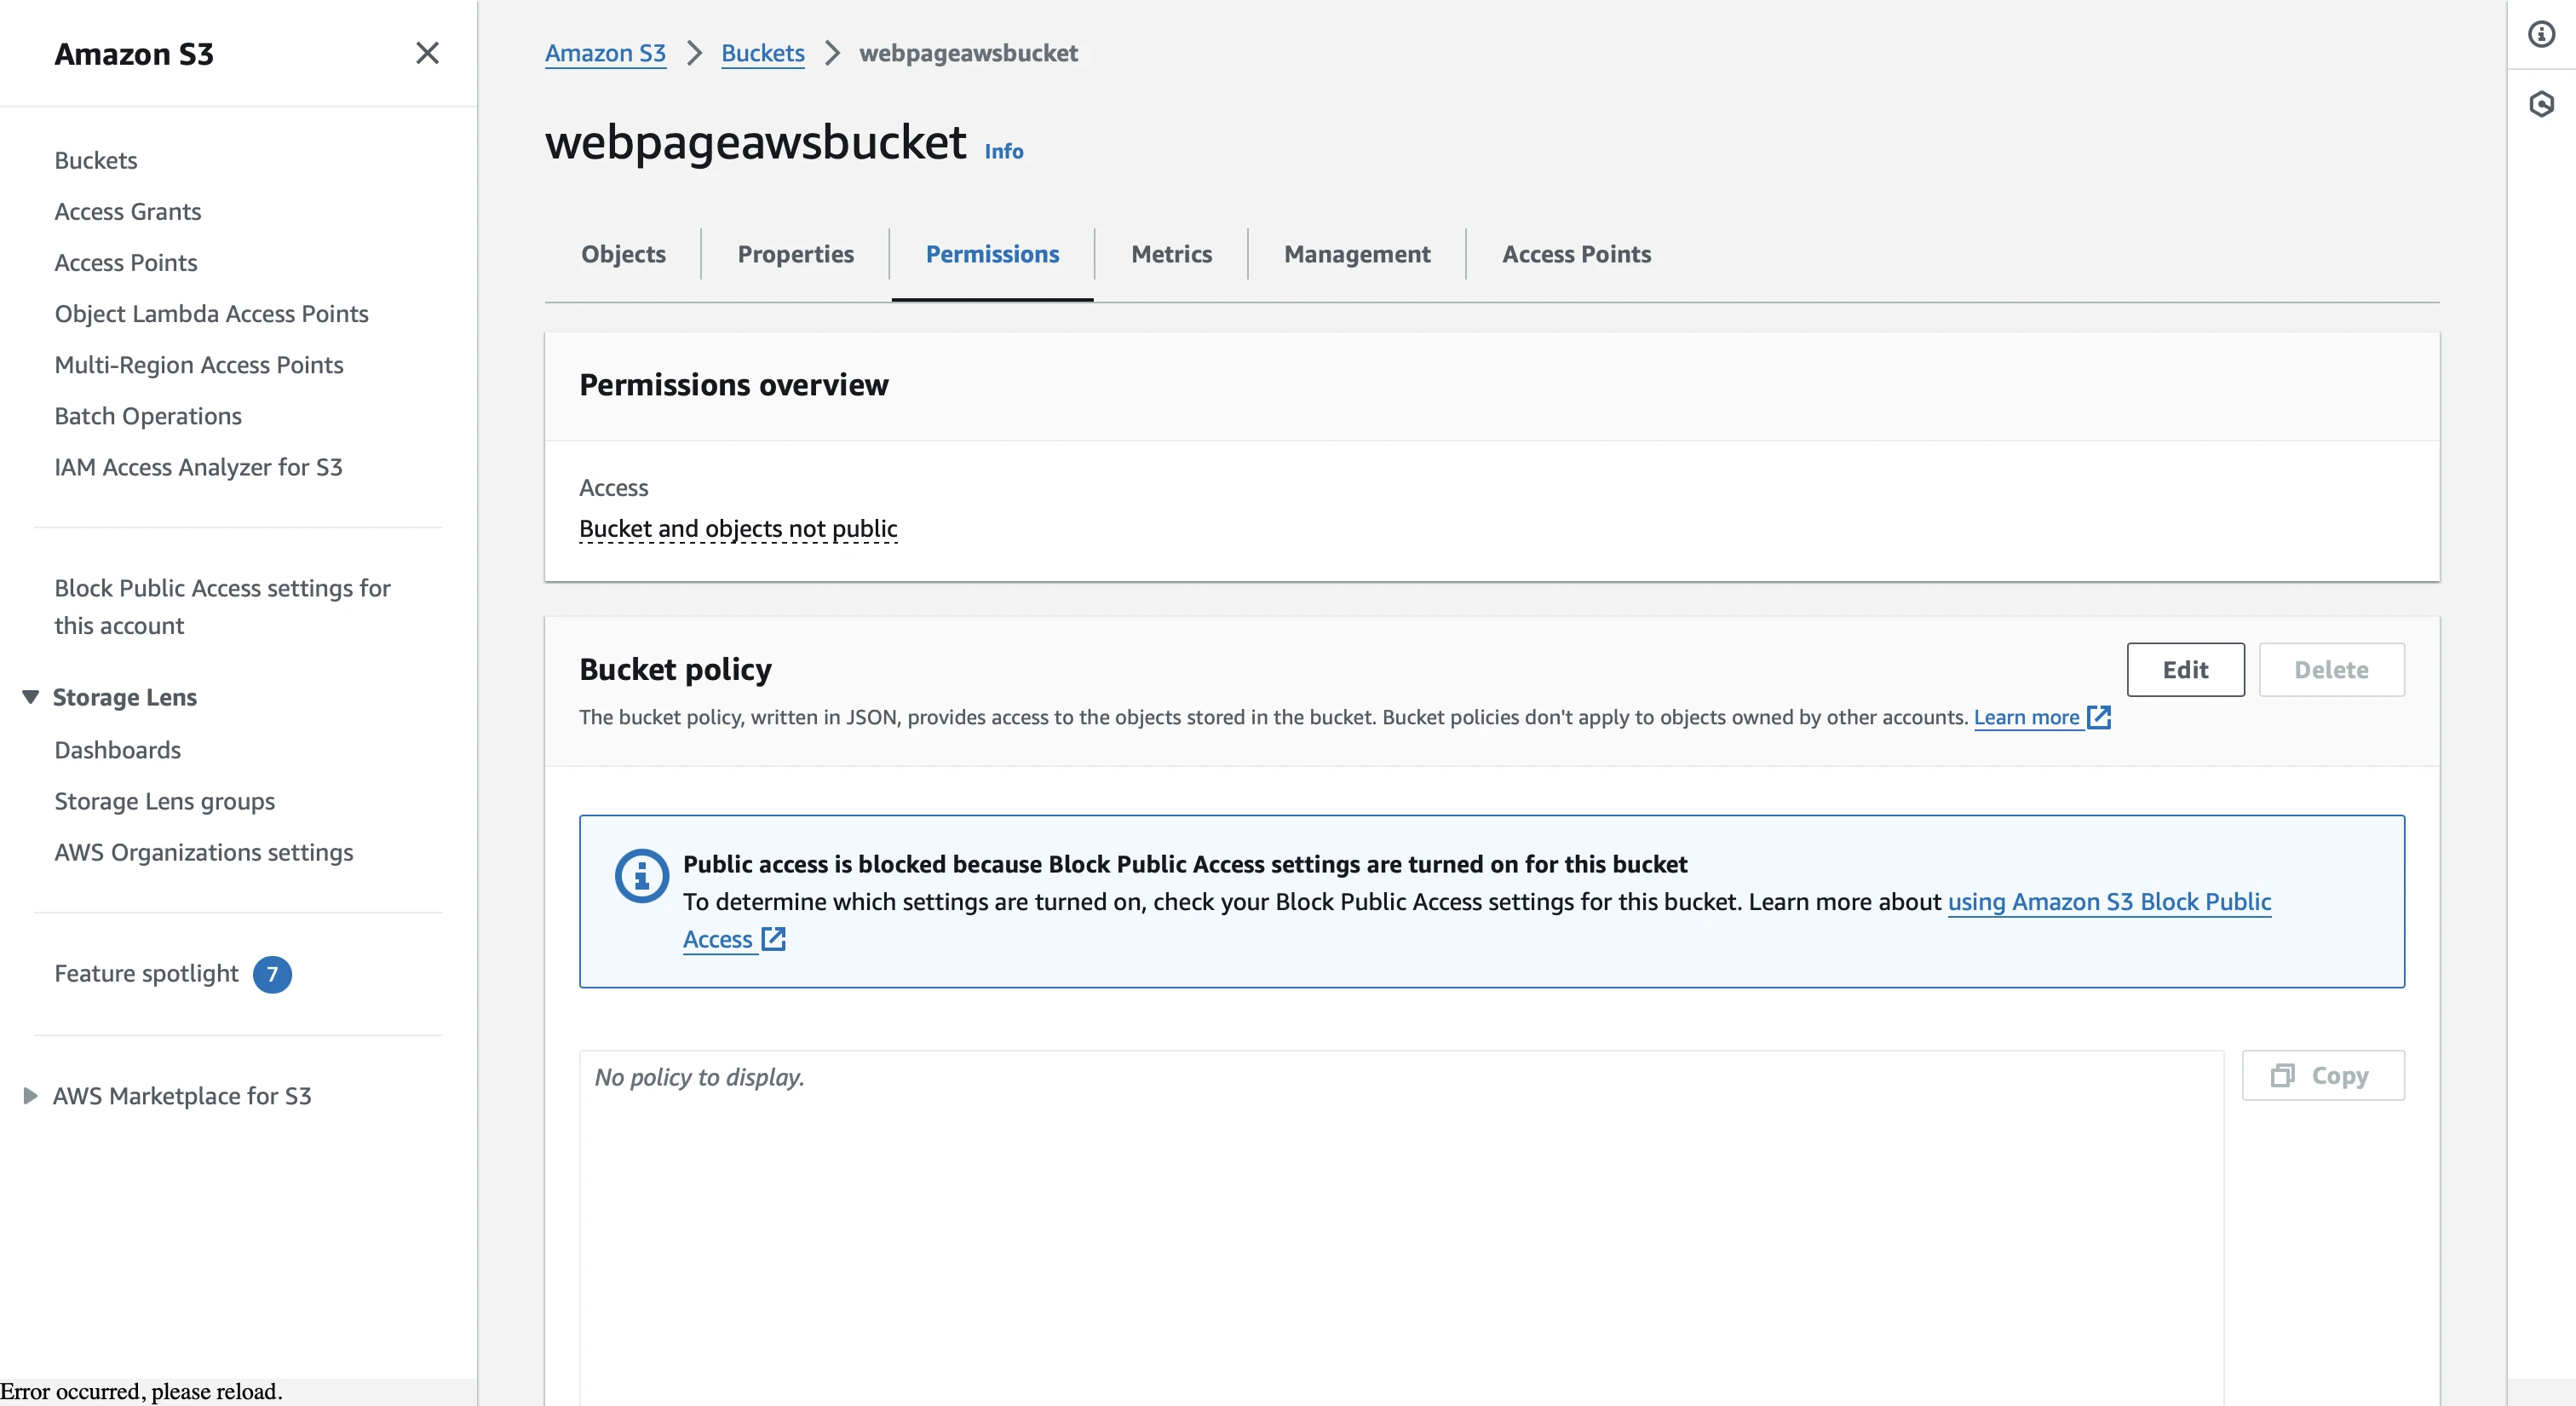
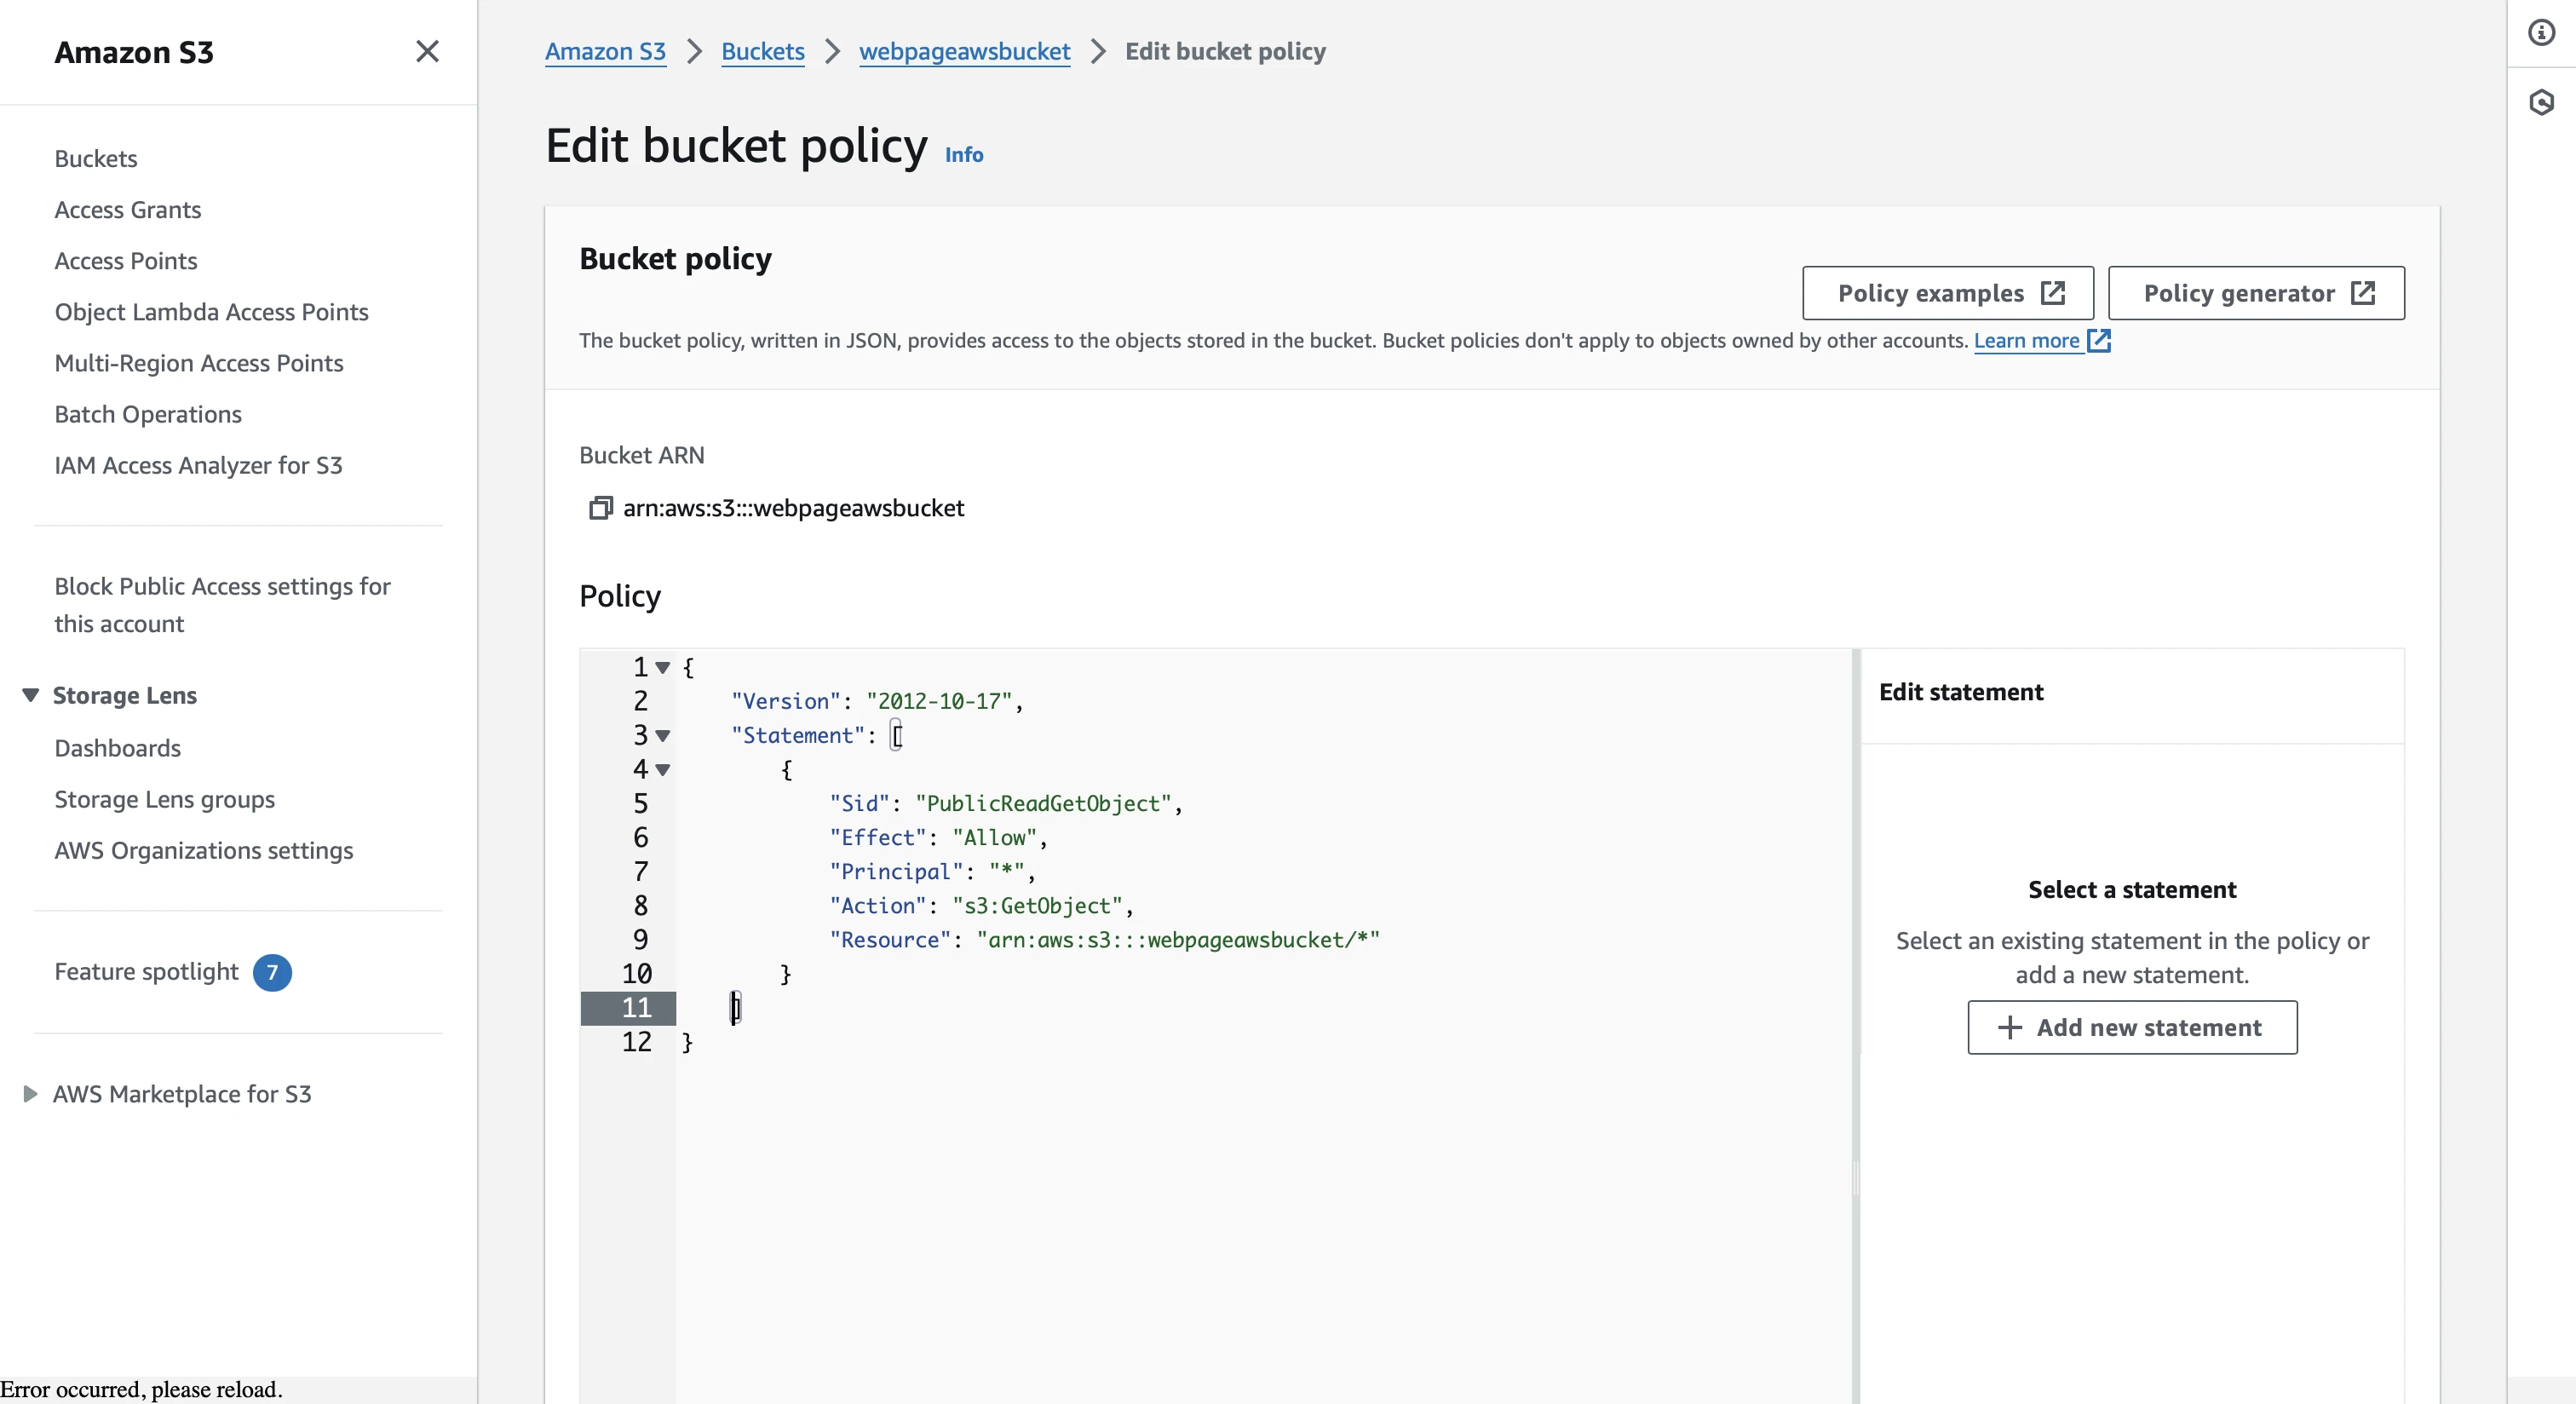
Head back to the S3 console and select your S3 bucket. Under the Permissions tab you'll find the setting for Bucket policy. Select Edit and copy/paste the following policy into the Bucket policy editor (replacing yourbucketname with your actual bucket name) and save the changes.
{
  "Version": "2012-10-17",
  "Statement": [
    {
      "Sid": "PublicReadGetObject",
      "Effect": "Allow",
      "Principal": "*",
      "Action": "s3:GetObject",
      "Resource": "arn:aws:s3:::yourbucketname/*"
    }
  ]
}
Now that the S3 bucket is configured, you can visit your Bucket website endpoint found under the Properties tab, Static website hosting settings. The URL will be in the format http://yourbucketname.s3-website-yourregion.amazonaws.com. It will respond with a 404 not found error. This is expected since we haven't uploaded any website files yet.
Upload your Website Files
Head back to the S3 console and select your S3 bucket. Under the Objects tab select Upload. Now drag and drop your static website files or select them from your file system. Ensuring that your index document is at the root of the bucket is absolutely crucial.
Alternatively as a temporary measure, you can copy the following HTML into a file named index.html (or whatever you specified as the index document) and upload it to your S3 bucket.
<html>
<head>
<meta name="viewport"
content="width=device-width,
initial-scale=1.0">
<title></title>
<style>
* {
font-family: sans-serif;
font-size: 26px;
text-transform: uppercase;
}
div {
position:absolute;
top:50%;
left:50%;
transform: translate(-50%,-50%);
white-space: nowrap;
}
</style>
</head>
<body>
<div>
Coming Soon
</div>
</body>
</html>
Now you should see your website by visiting the Bucket website endpoint.
Create Certificate through Certificate Manager
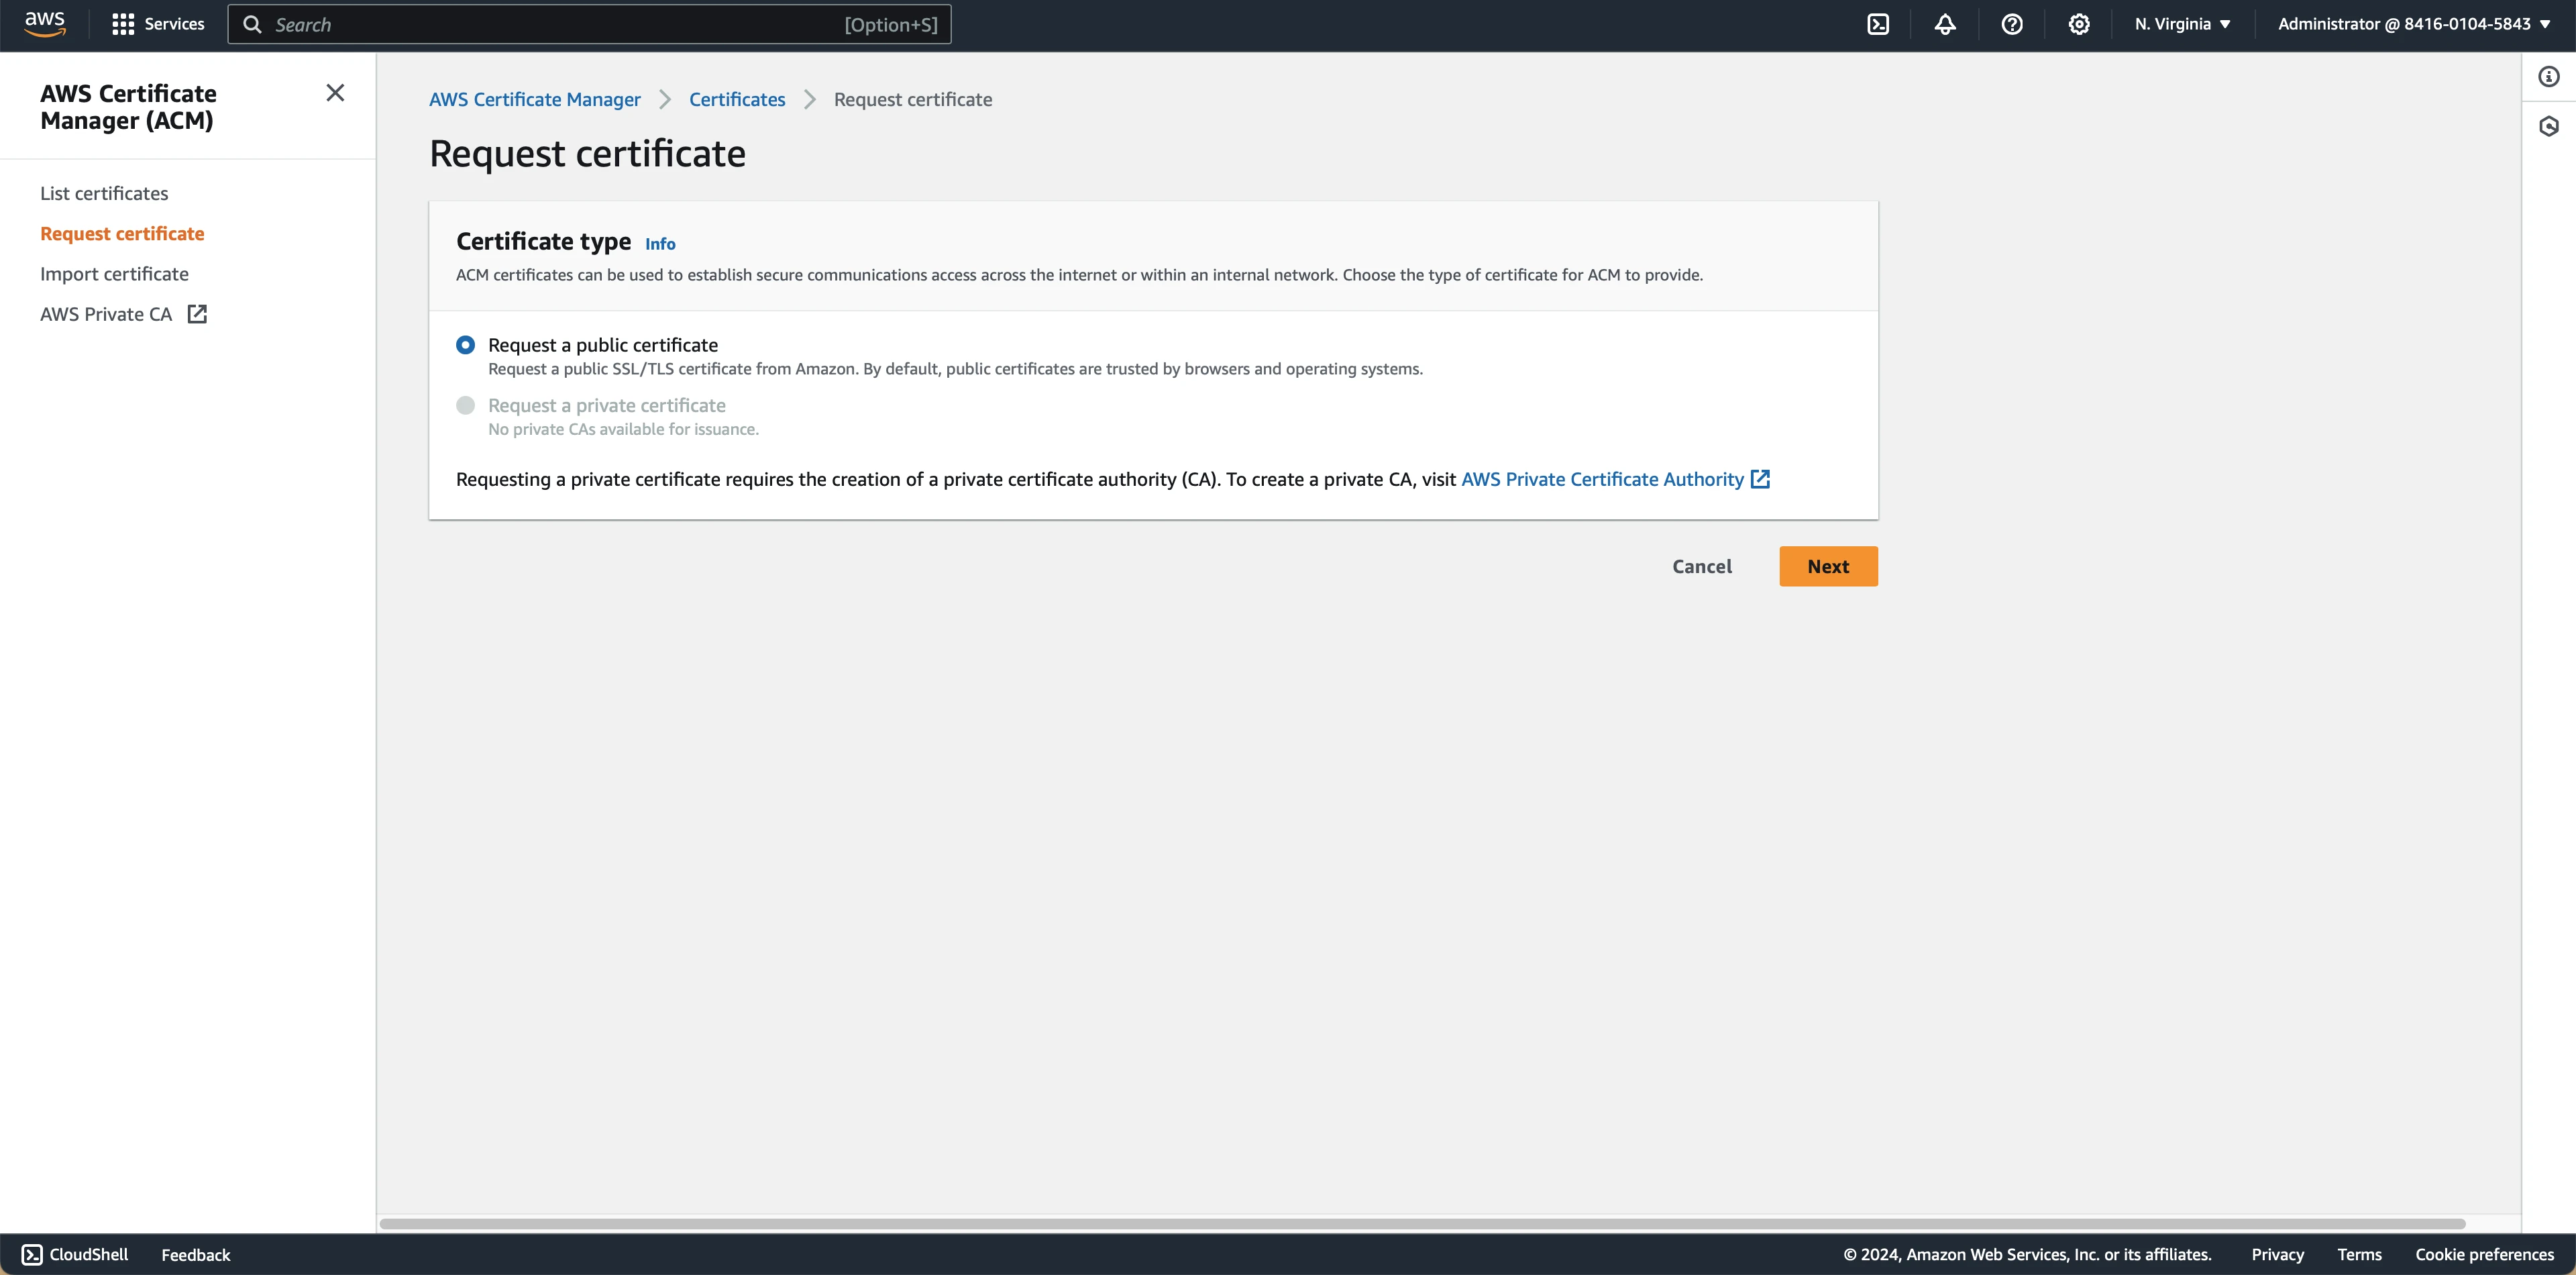
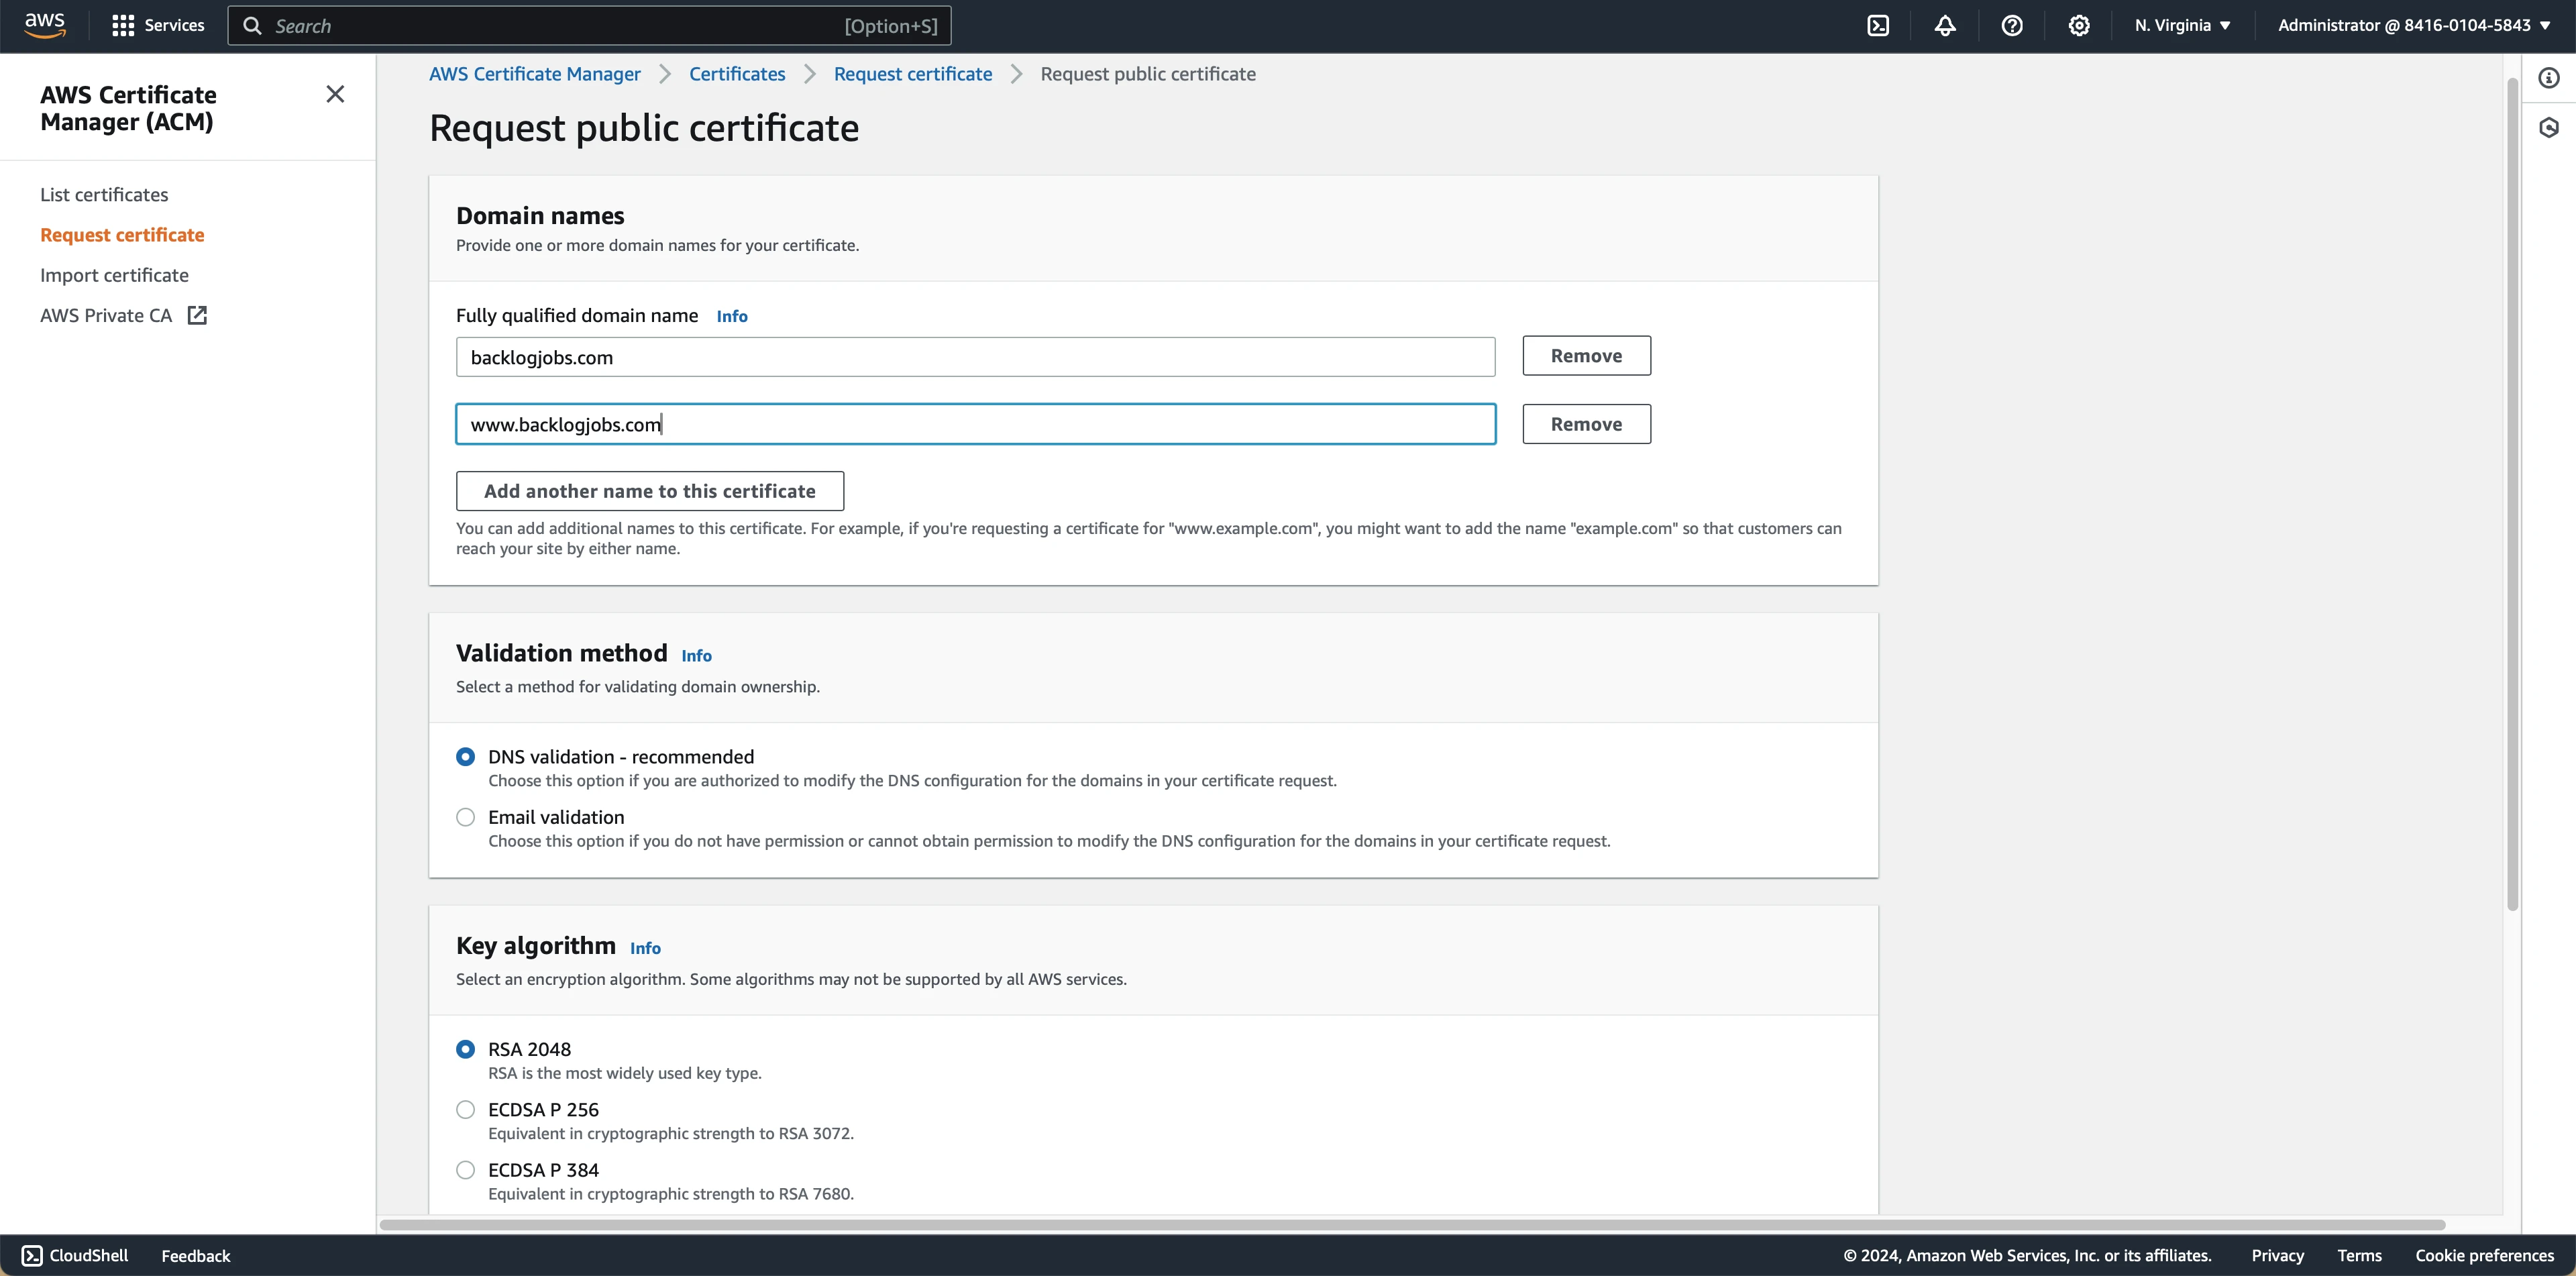
This guide assumes you have access to the domain registrar and can update the DNS settings for the domain. Navigate to the Certificate Manager console and select Request to create a new certificate. Begin the process of creating a certificate for your website by selecting Request a public certificate for certificate type.
A note on pricing for this resource and automatic certificate renewal:
Public SSL/TLS certificates provisioned through AWS Certificate Manager are free. You pay only for the AWS resources you create to run your application.
Amazon Certificate Manager provides managed renewal for your Amazon-issued SSL/TLS certificates. This means that ACM will either renew your certificates automatically when you are using DNS validation.
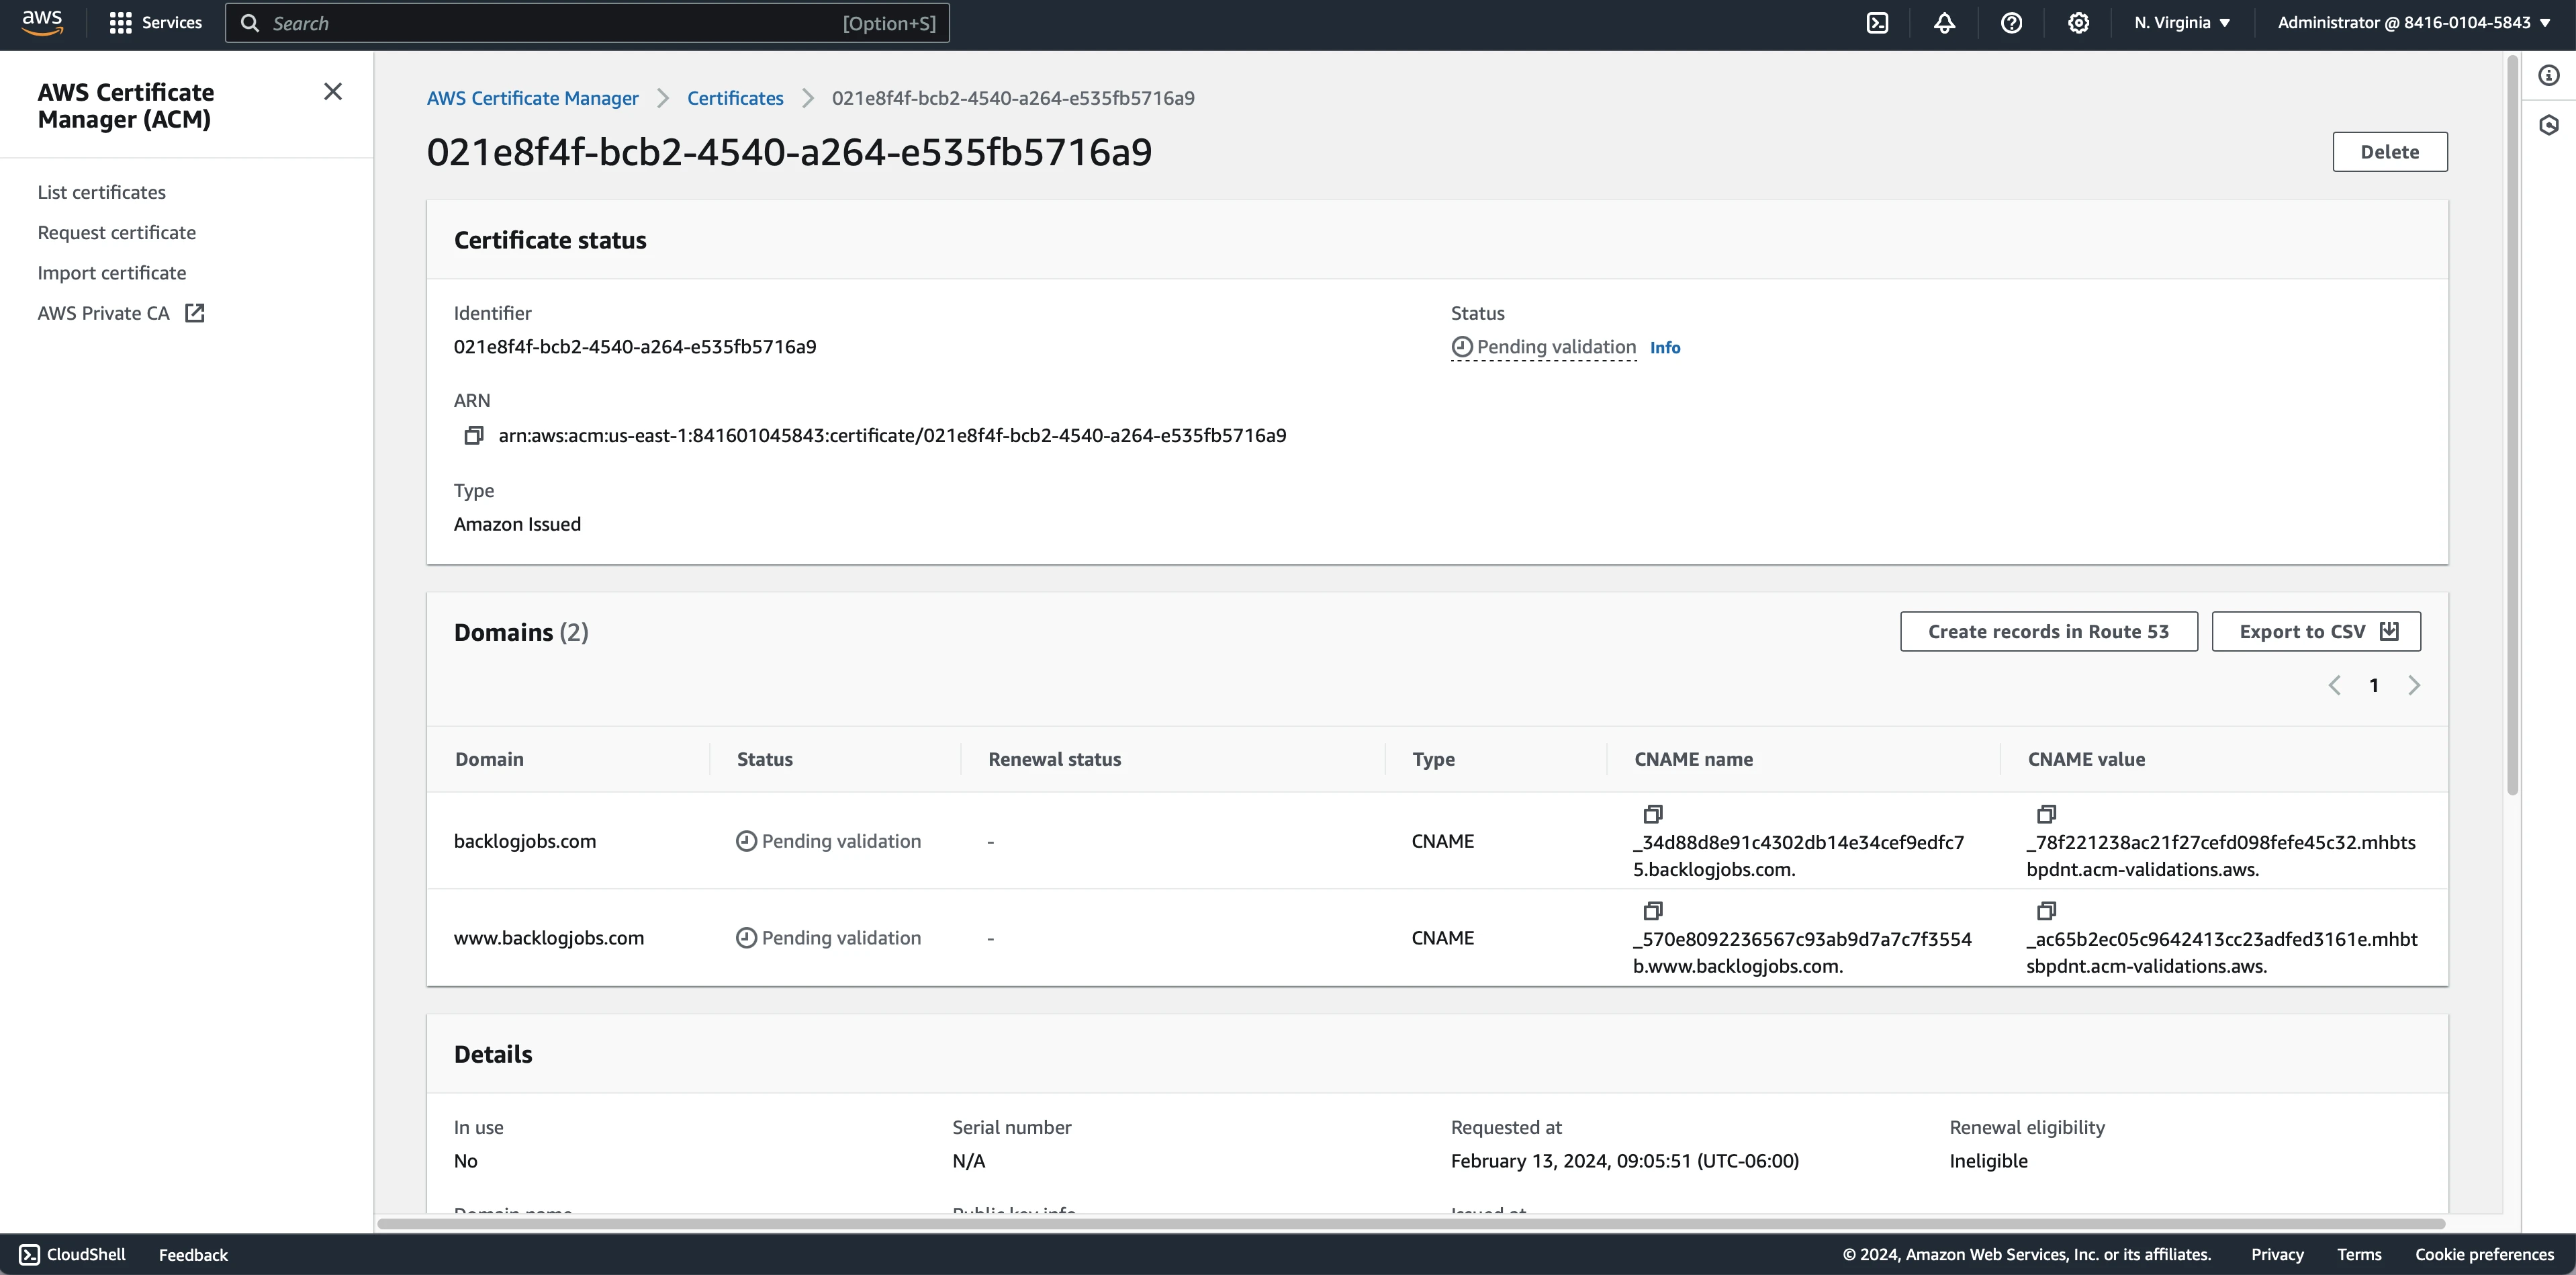
Now let's validate the certificate by adding a CNAME record to the DNS settings for your domain. Head back to the Certificate Manager console and select the certificate you just created. Under the Domains section you'll find a set of CNAME values that you'll use to update your DNS settings. One for each domain you specified when creating the certificate.
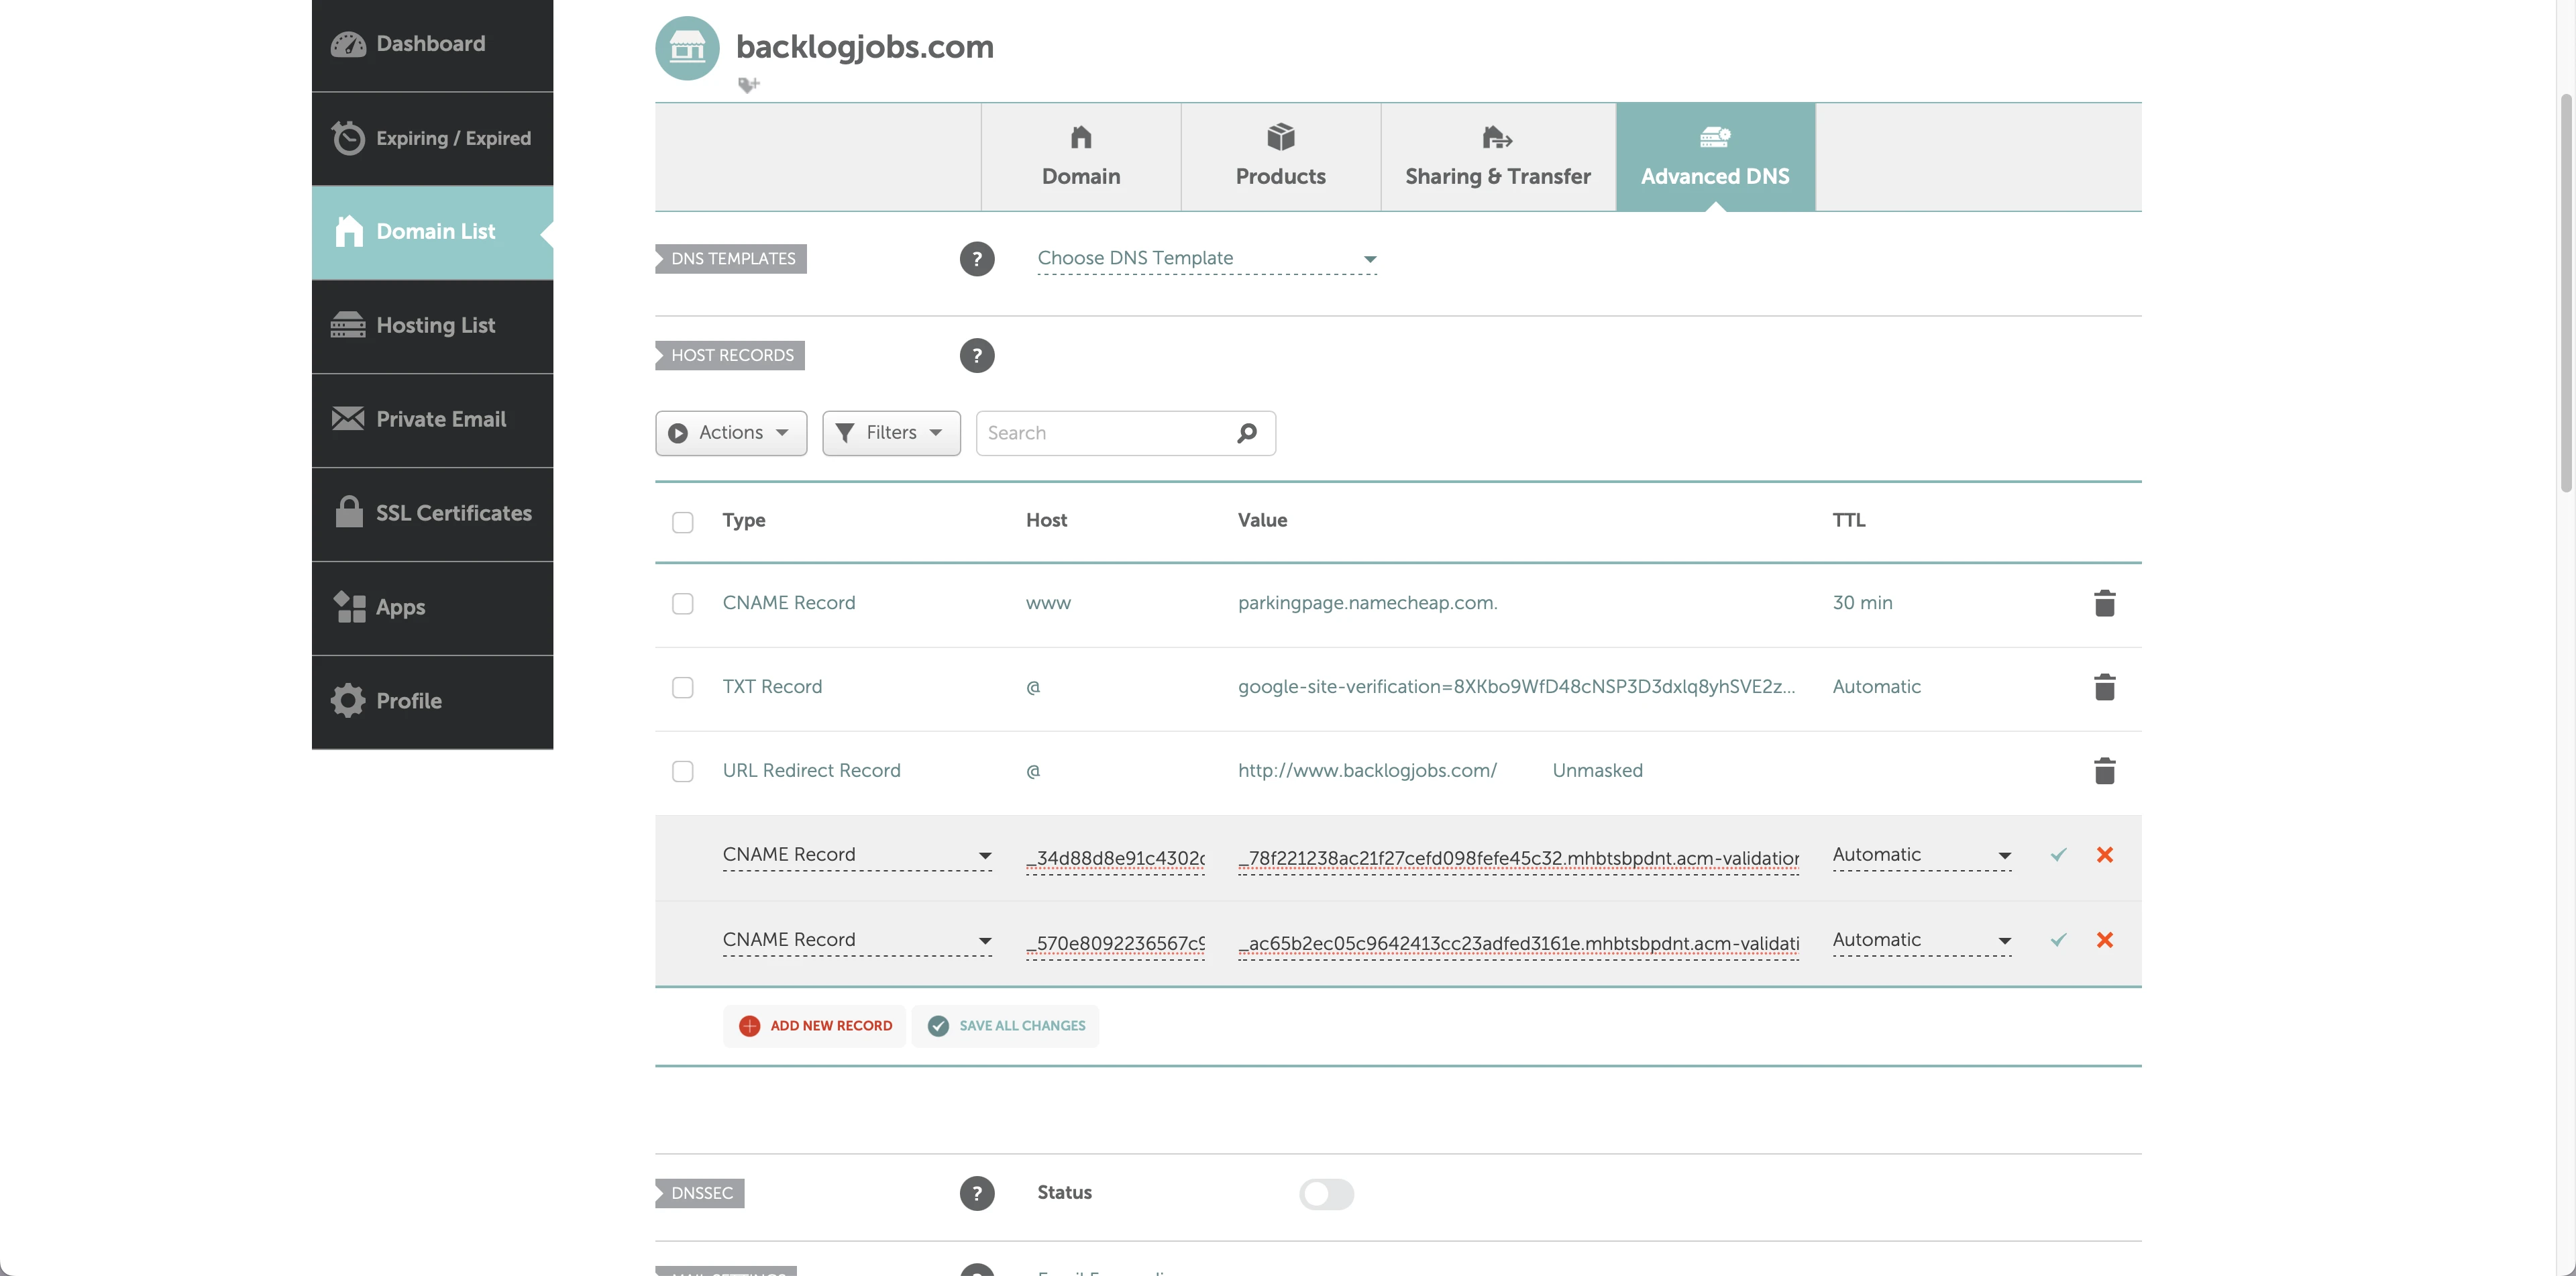
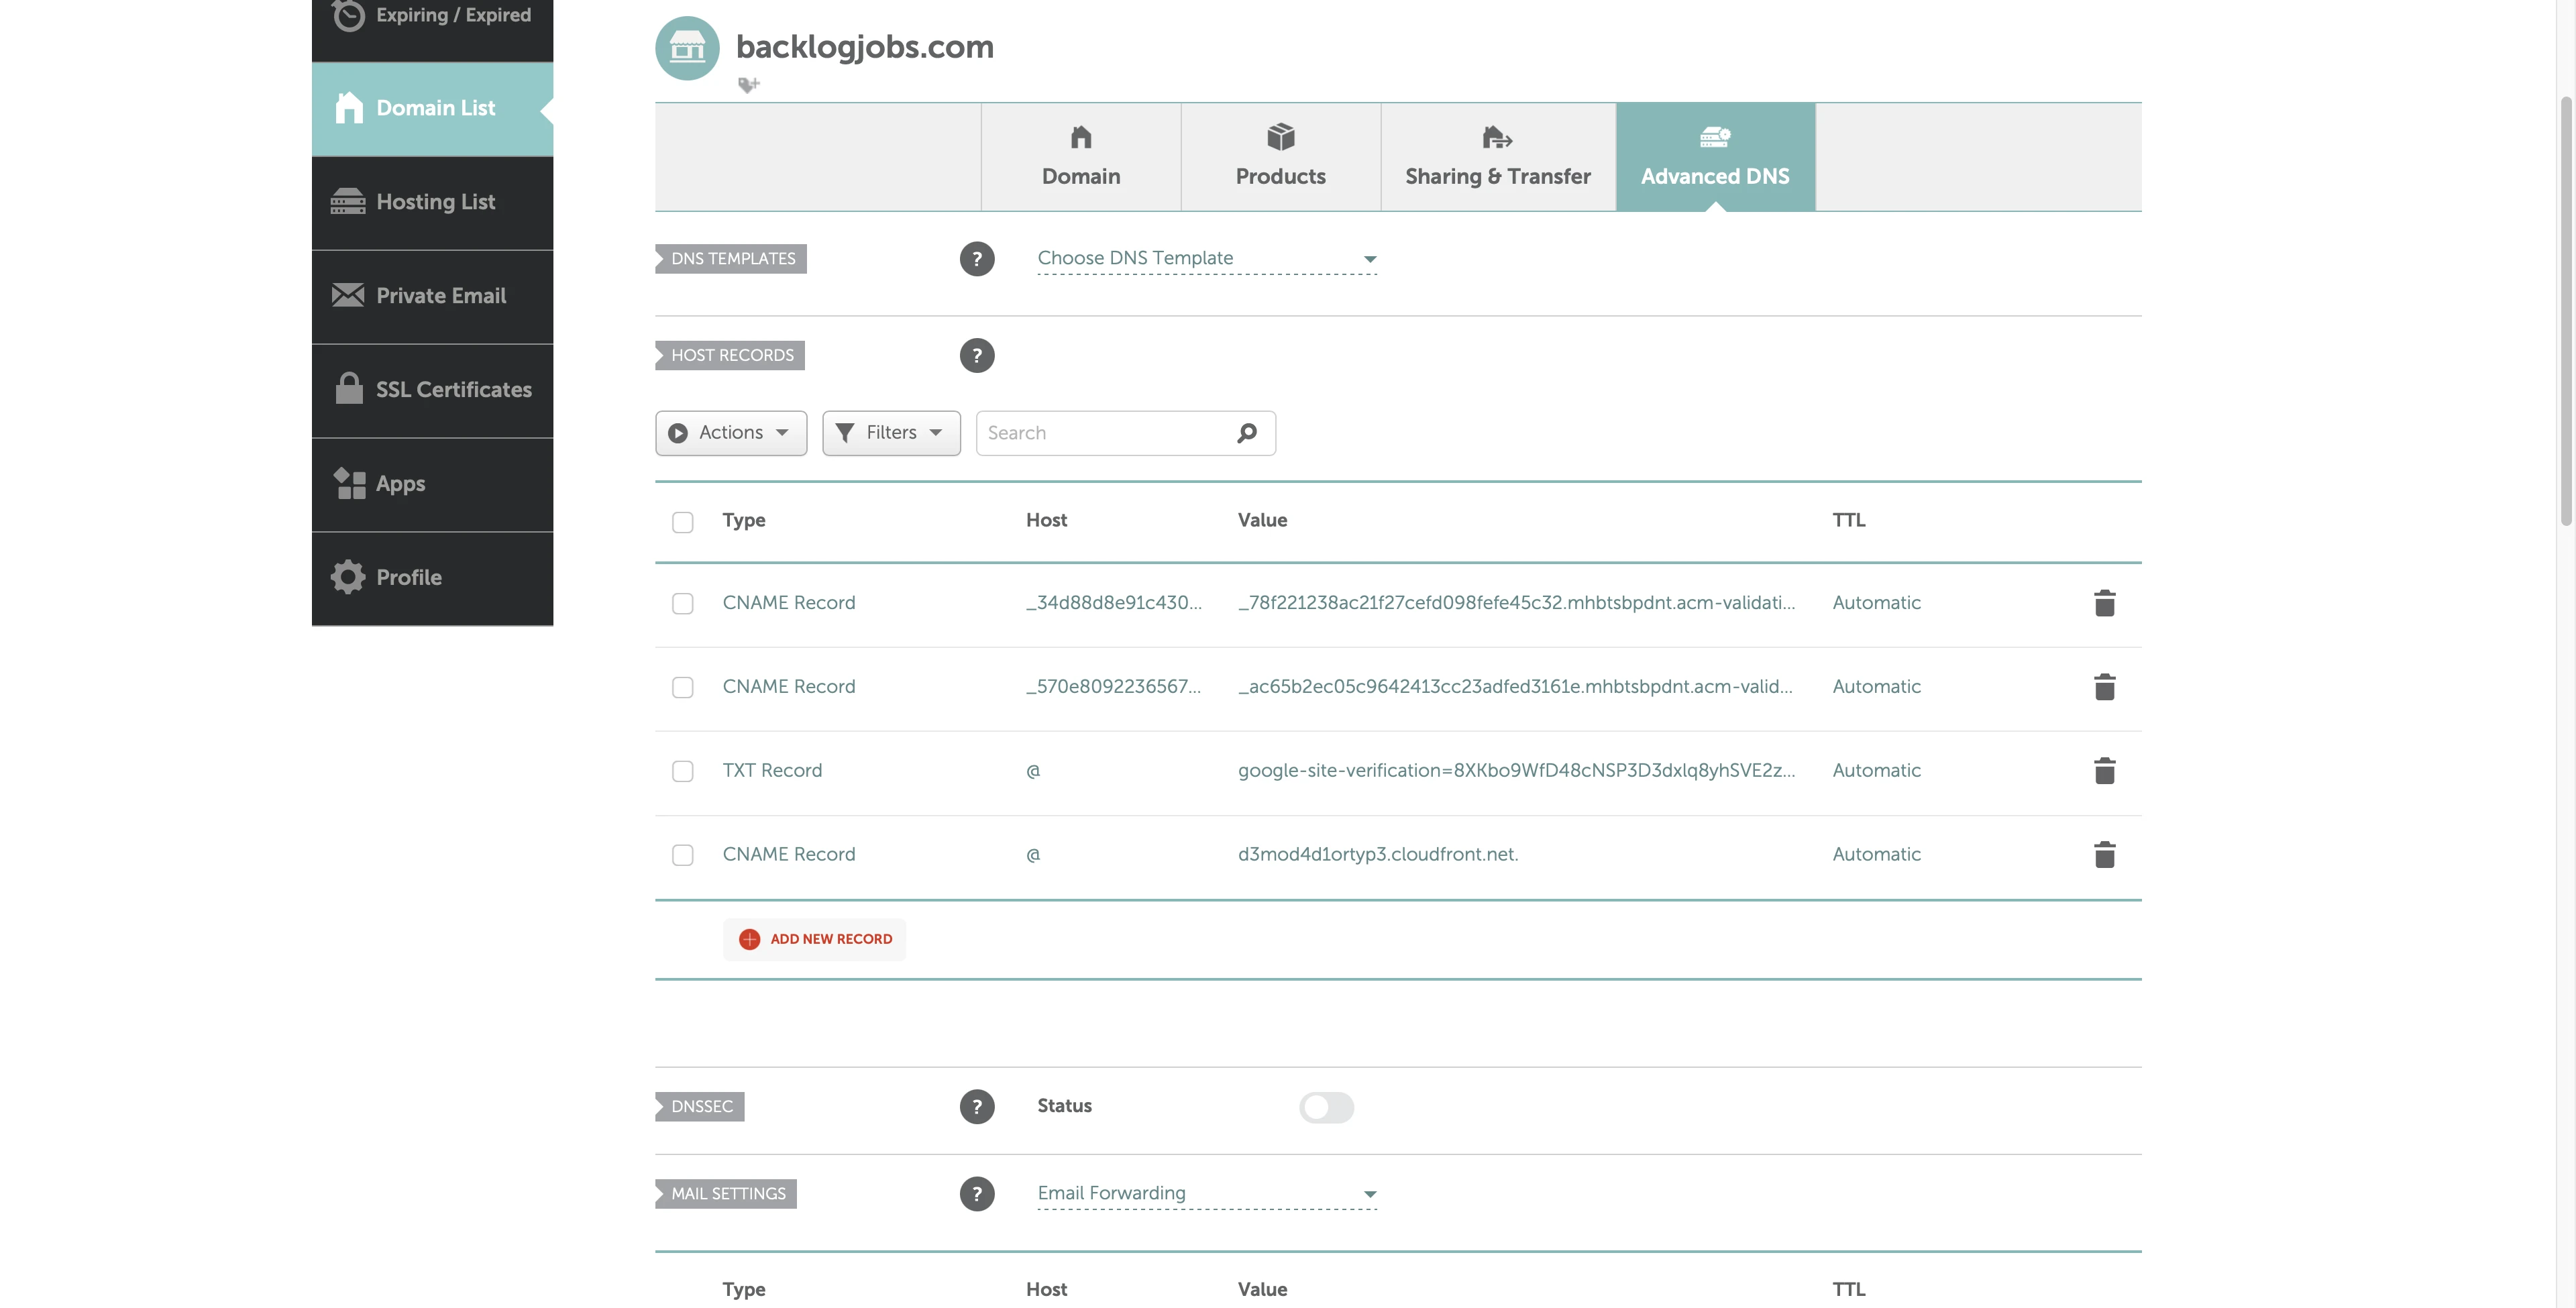
Here is how I typed in the CNAME records into the DNS settings for my domain on Namecheap:
| TYPE | HOST | VALUE |
|---|---|---|
| CNAME | _34d88d8e91c4302db14e34cef9edfc75 | _78f221238ac21f27cefd098fefe45c32.mhbtsbpdnt.acm-validations.aws. |
| CNAME | _570e8092236567c93ab9d7a7c7f3554b.www | _ac65b2ec05c9642413cc23adfed3161e.mhbtsbpdnt.acm-validations.aws. |
Once you've added the CNAME records, give it a few minutes and the certificate manager will automatically validate and issue your certificate. If there is any trouble with the validation, Amazon has guidance on DNS validation and other validation methods.
Create and configure the CloudFront CDN
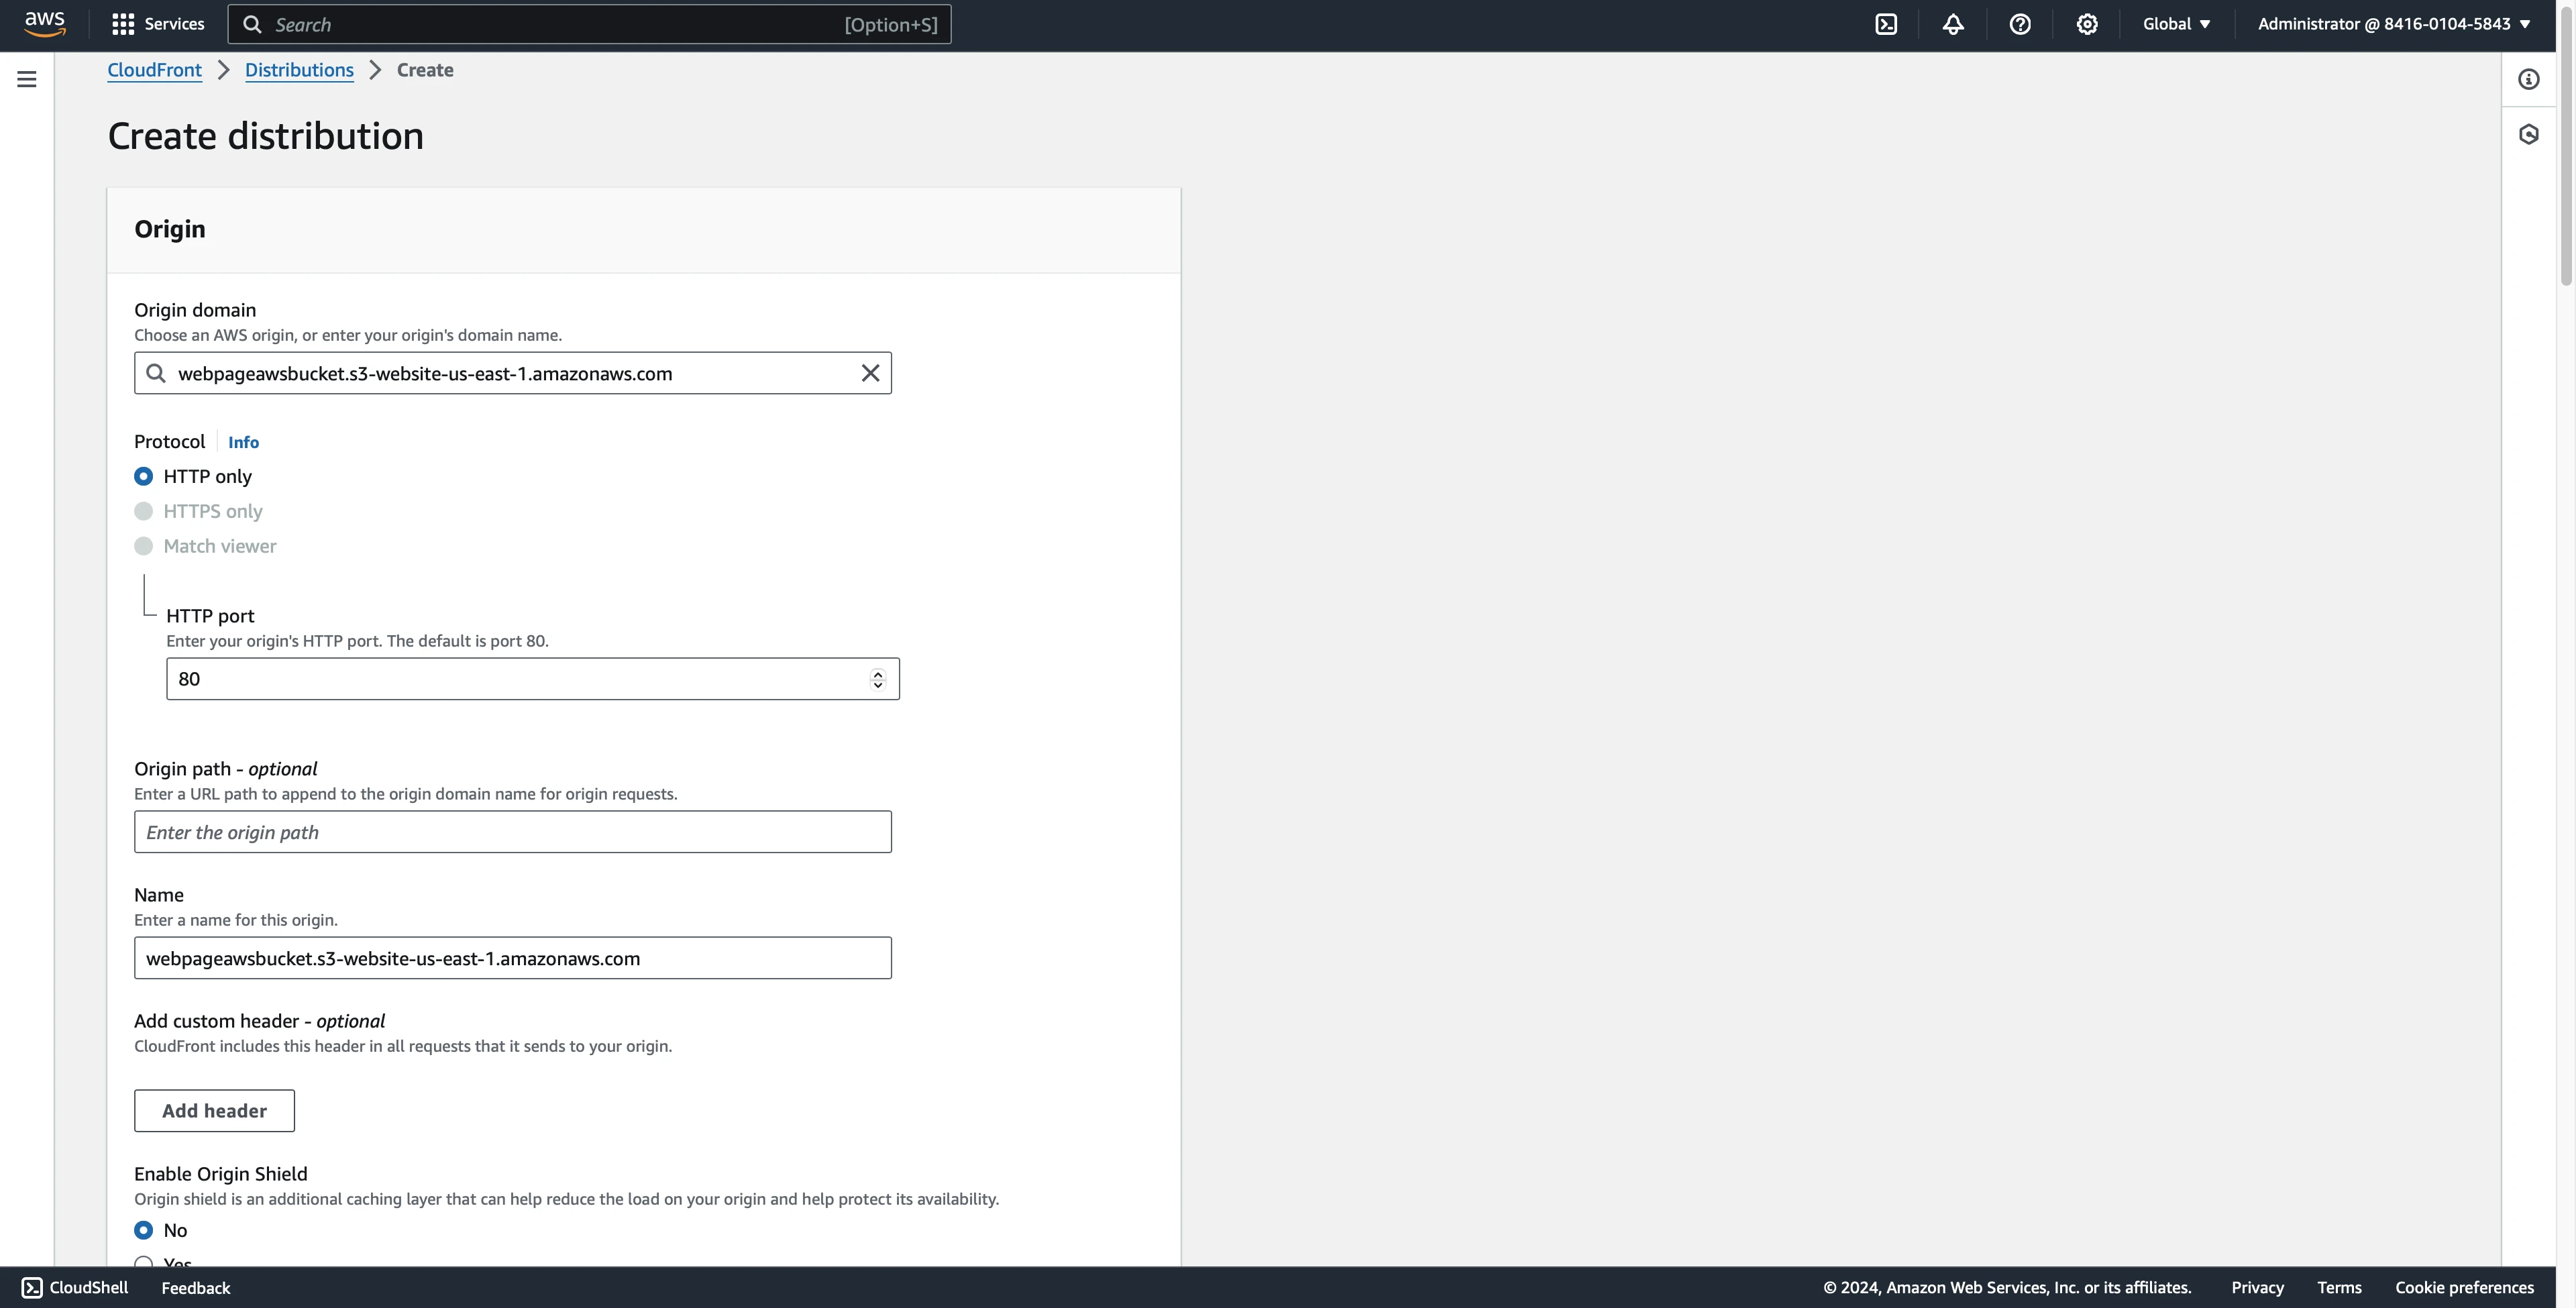
Navigate to the CloudFront console and select Create distribution.
A note on pricing for this resource:
When using AWS CloudFront as your content delivery network (CDN), it's important to understand the pricing components to effectively manage your costs. CloudFront pricing is primarily based on three factors: data transfer out rates, the number of HTTP/HTTPS requests, and any additional data transfer costs when using origins outside of AWS.
Data Transfer Out: CloudFront charges for data transferred out to the internet and to the origin. Prices vary by region, with the first 10TB per month ranging from $0.085 to $0.120 per GB in different regions for internet transfers. Data transfer to the origin is significantly cheaper, costing $0.020 to $0.160 per GB depending on the region.
HTTP/HTTPS Requests: CloudFront also charges based on the number of HTTP or HTTPS requests made. The cost is as low as $0.0075 per 10,000 HTTP requests in some regions, with HTTPS requests being slightly higher.
Free Tier: AWS offers a CloudFront free tier, available indefinitely, which includes 1 TB of data transfer out to the internet, 10 million HTTP or HTTPS requests, 2 million CloudFront Function invocations. This free tier also includes free SSL certificate usage.
Additional Costs: It's worth noting that there are no charges for origin fetches from AWS services like S3, EC2, or Elastic Load Balancers, making CloudFront an even more cost-effective option for AWS-based resources.
By understanding these pricing components, you can optimize your websites performance with CloudFront while keeping costs in check.
When creating this distribution here are the settings that must be set:
- Origin Domain Name: Select the S3 bucket you created as the origin domain name ensuring that you select Use website endpoint when prompted
- Viewer protocol policy: Select Redirect HTTP to HTTPS
- Alternate domain name (CNAME): specify the domain you will access the website from. Create an entry for each domain such as yourdomain.com, *.yourdomain.com. More about alternate domains can be found at here.
- Custom SSL certificate: specify the certificate you created in the previous step in the dropdown
Everything else can remain to its default setting unless you have specific requirements. Now attempt to create the distribution, if you are missing any settings you'll be prompted to fill them in.
Once the distribution is created, you'll be given a Domain Name for your distribution. This is the URL that you'll use to access your website. It will be in the format d62omvldbghxb.cloudfront.net. You can visit this URL and see your website live.
Connect your Domain
The final step is to connect your domain to the CloudFront distribution. This is done by updating the DNS settings for your domain with your domain registrar. You'll need to add a CNAME record that points to the CloudFront distribution domain name.
| TYPE | HOST | VALUE |
|---|---|---|
| CNAME | @ | d62omvldbghxb.cloudfront.net. |
URL Routing Challenges
If you are using a single page application (SPA) framework (React, Vue, Angular) a static site generator (Gatsby and others), or even depending on how your website files are structured, you may encounter issues with accessing non-root routes. This will happen when attemppting to access a URL directly like mywebsite.com/nested/route. To resolve this, we'll use a CloudFront function to direct these requests to the correct place on your website.
If you come across this challenge, visit the CloudFront functions page and create a new function selecting the lastest JavaScript runtime (the following function was written for the cloudfront-js-2.0 runtime).
The function listed here was written for a Next.js application. This function appends .html to requests that don't have a file extension and removes trailing slashes from requests that are not the root URL. Your application may have slightly different routing needs, so you should test and/or adapt this function to meet those needs. Learn more about CloudFront functions here.
async function handler(event) {
  const config = {
    suffix: '.html',
    appendToDirs: 'index.html',
    removeTrailingSlash: true,
  };

  const regexSuffixless = //[^/.]+$/; // e.g. "/some/page" but not "/", "/some/" or "/some.jpg"
  const regexTrailingSlash = /.+/$/; // e.g. "/some/" or "/some/page/" but not root "/"

  const request = event.request;
  const uri = request.uri;

  // Append ".html" to origin request
  if (config.suffix && uri.match(regexSuffixless)) {
    request.uri = uri + config.suffix;
    return request;
  }

  // Remove trailing "/" for non-root requests and append .html
  if (config.removeTrailingSlash && uri.match(/.+/$/)) {
    request.uri = uri.slice(0, -1) + config.suffix;
    return request;
  }

  return request;
}
Once created, you can test and publish the function on the same page. After publishing, you'll need to associate the function with your CloudFront distribution. This is done by visiting the publish tab. You'll find the Associated distributions section where you can select the distribution you want to associate the function with.
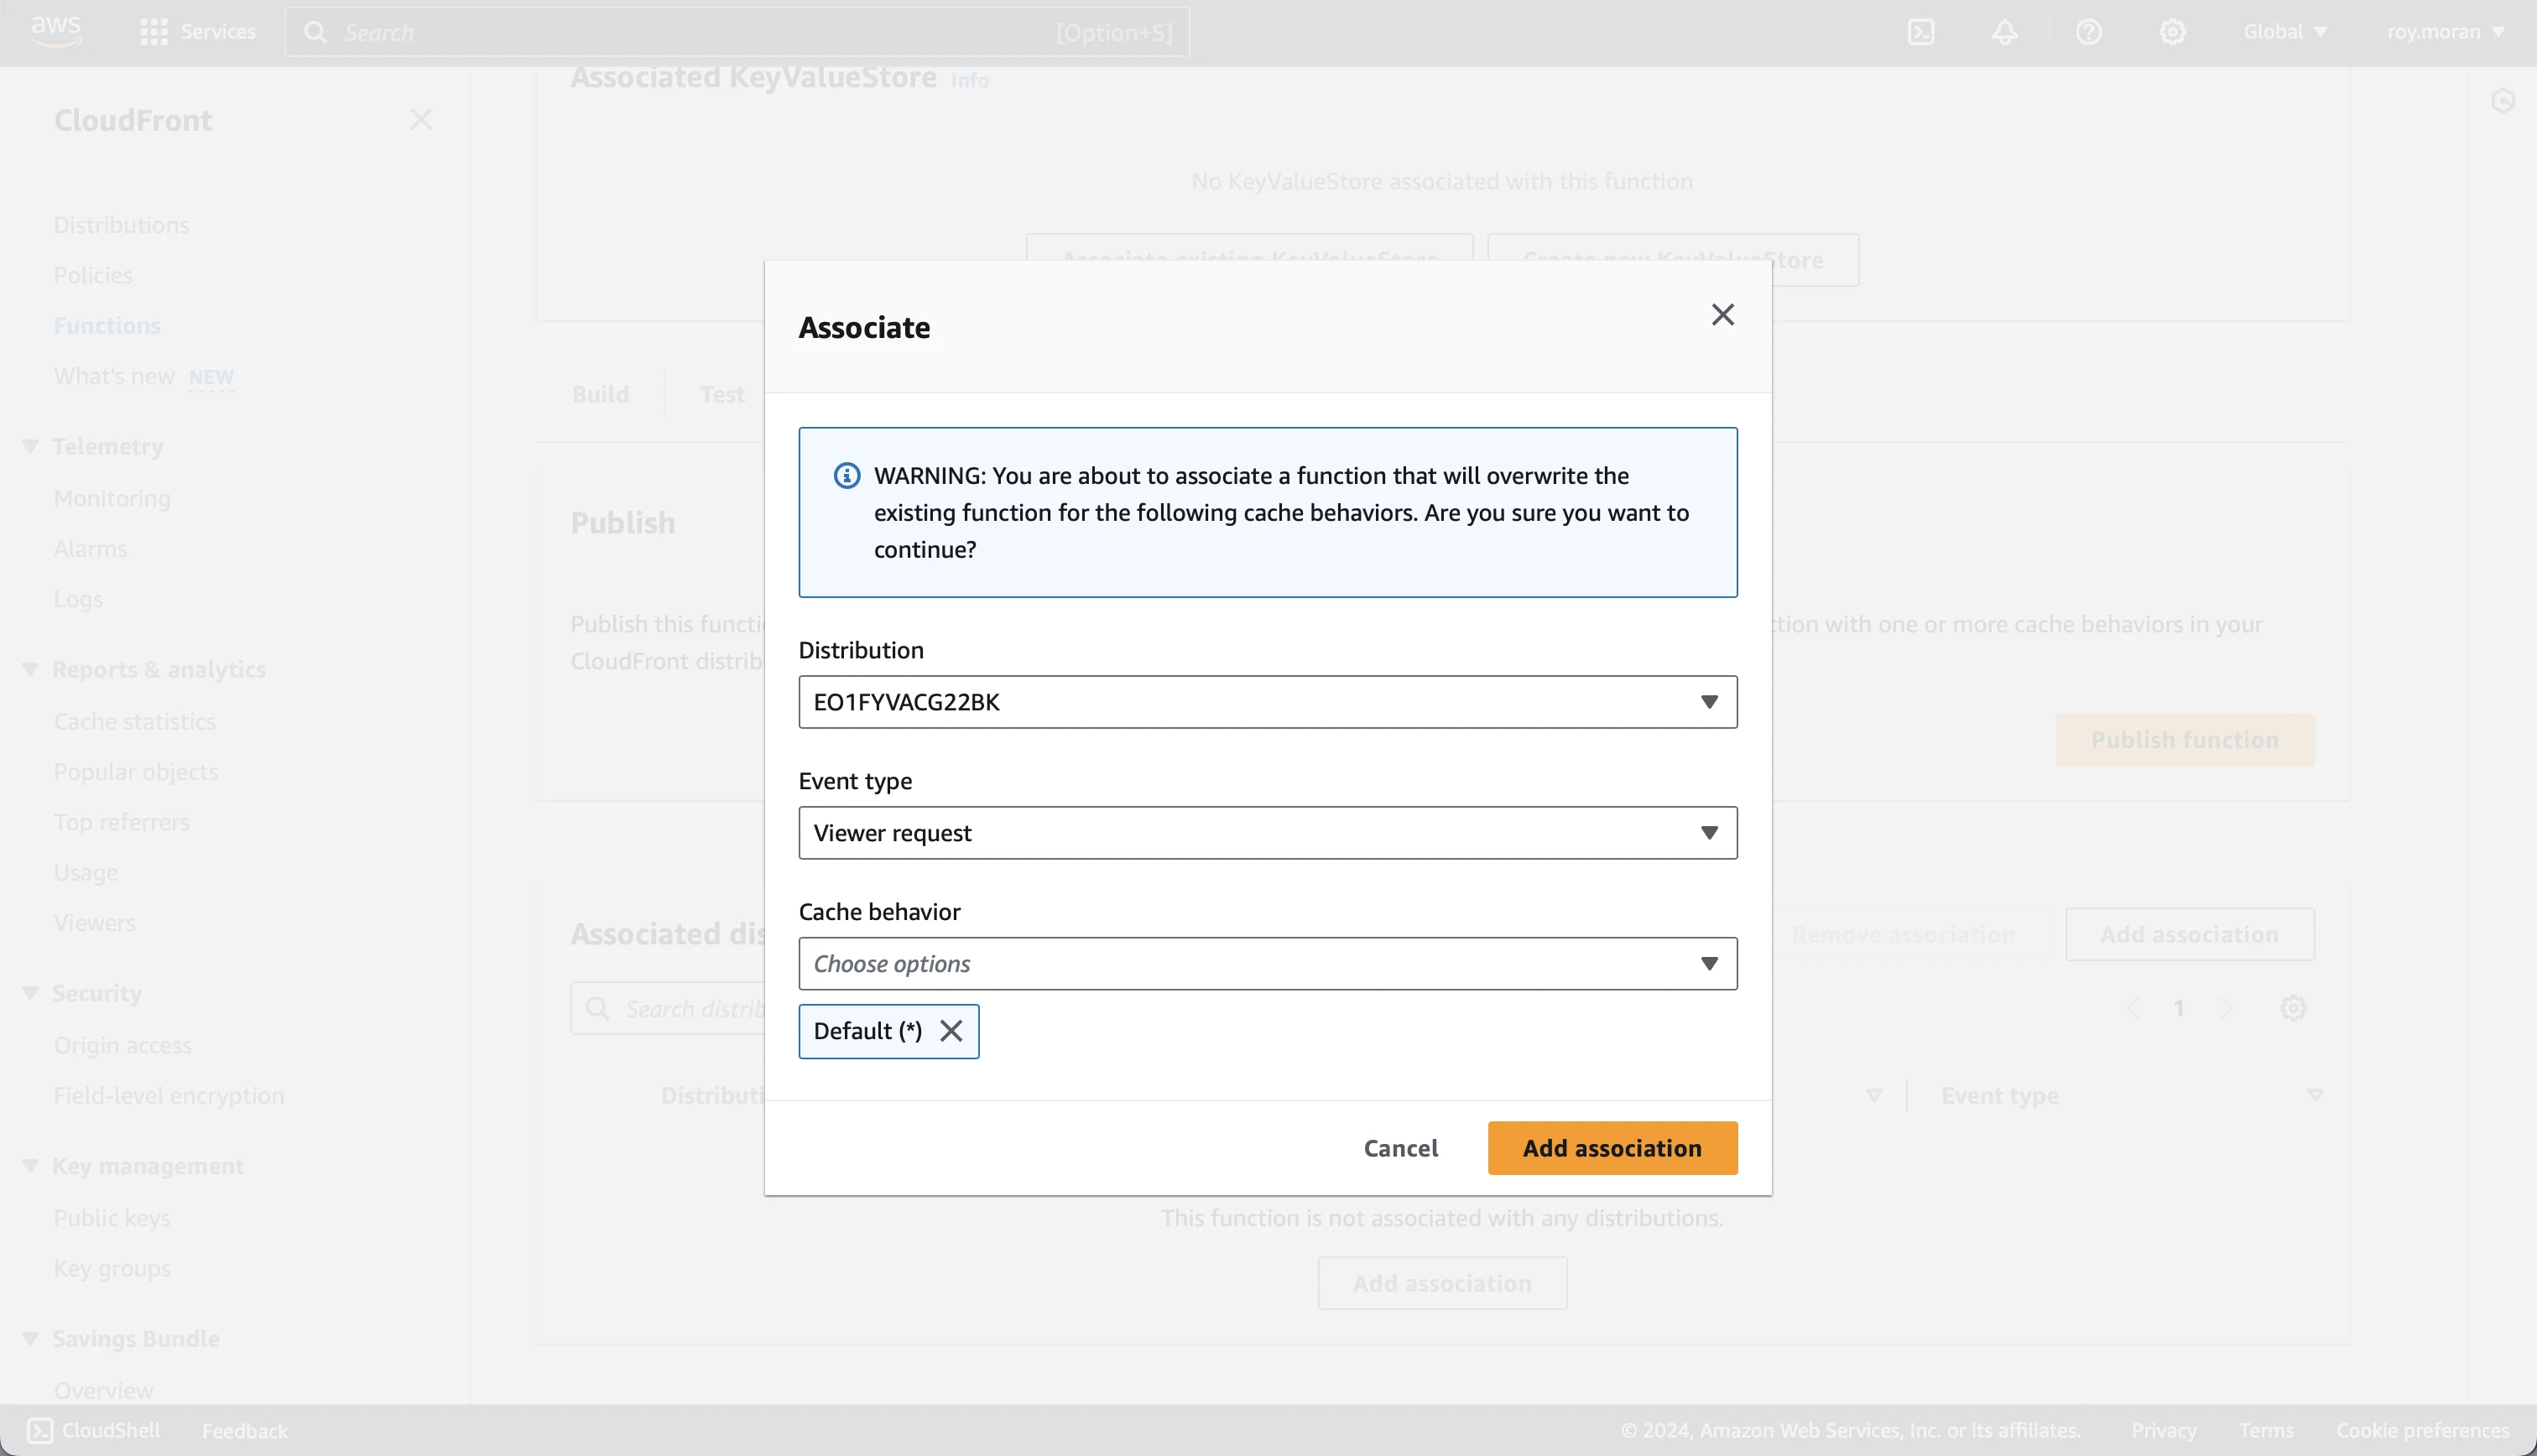
Once associated, the function will be live and you can test your website to see if the routing issues are resolved.